Troubleshooting Guide: Solving Minecraft Crash Error with Exit Code 1 on Windows

Troubleshooting Guide: Solving Minecraft Crash Error with Exit Code 1 on Windows
Quick Links
- Use the Correct Mod Version
- Detect and Delete the Problematic Mod
- Update Your Graphics Driver
- Edit the Minecraft Launcher Path
- Change the Java Executable File
- Reinstall Minecraft
Key Takeaways
- The Minecraft Exit Code 1 error often appears when the mod version you’re using is different from the game version. You should make sure the mod version you use matches your Minecraft version.
- Alternatively, you can try looking for the problematic mod in the mods folder and delete it from your computer.
- If removing the problematic mod doesn’t fix the issue, you can also try updating the graphics driver, changing the Minecraft launcher path, changing the Java executable file, or reinstalling Minecraft.
Minecraft is still one of the most popular games on the planet, but it’s far from perfect. Sometimes the game will crash with the “Exit Code 1” error, leaving it in an unplayable state. Fortunately, it’s a common issue, and we will show you how to fix it in no time.
Use the Correct Mod Version
One of the main reasons you’re running into the Exit Code 1 error on Minecraft is because your mod version doesn’t match the Minecraft version installed on your computer. All of the mods you’re using should be the same as the version of Minecraft you’re using.
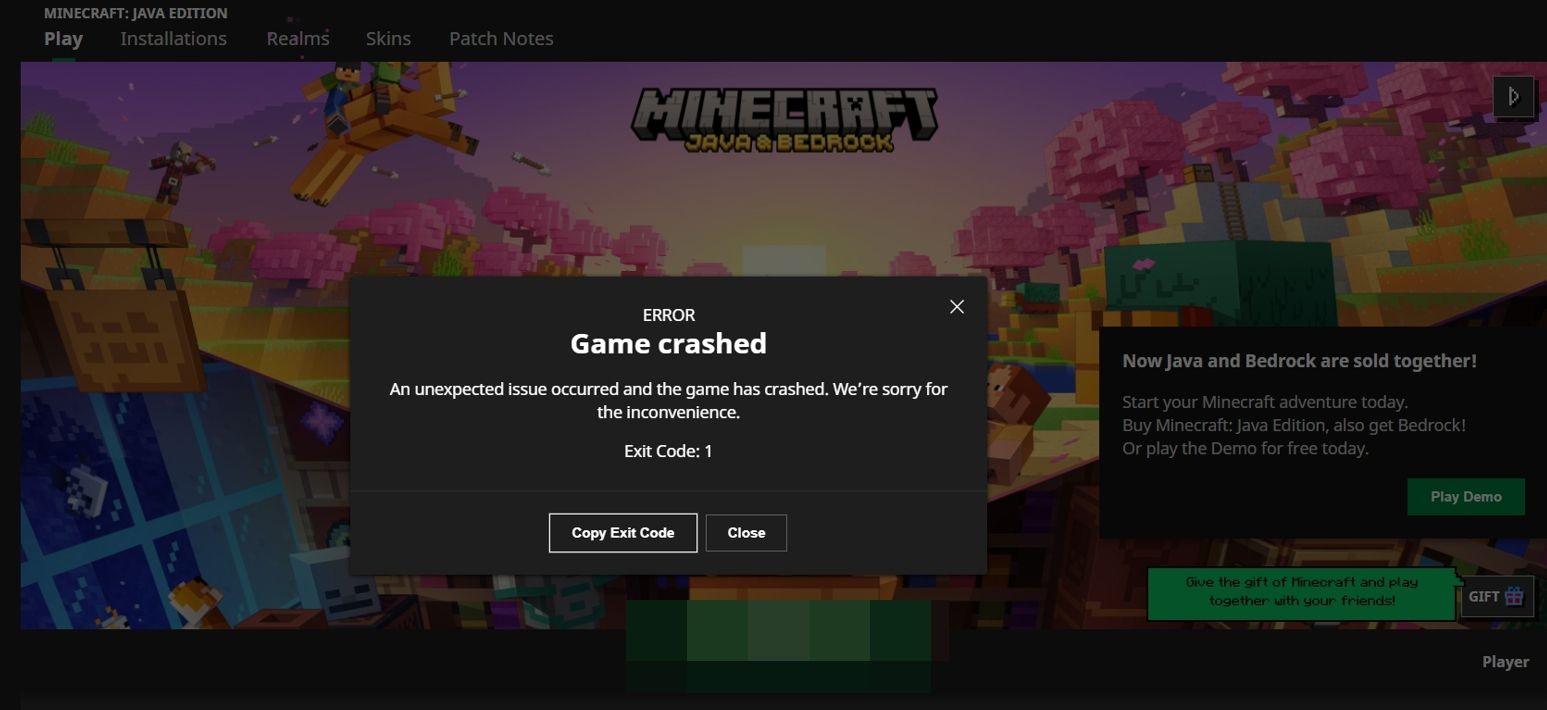
For example, if you have Minecraft version 1.20.6 installed on your computer and you have a mod made for version 1.19.4, you might see the error. In this case, you’ll need to manually update the outdated mod to its latest version.
To do this, you’ll first need to check the Minecraft version installed on your computer. Open Minecraft, click the “Installations” tab, and check the “Latest Release” entry to see your Minecraft version.
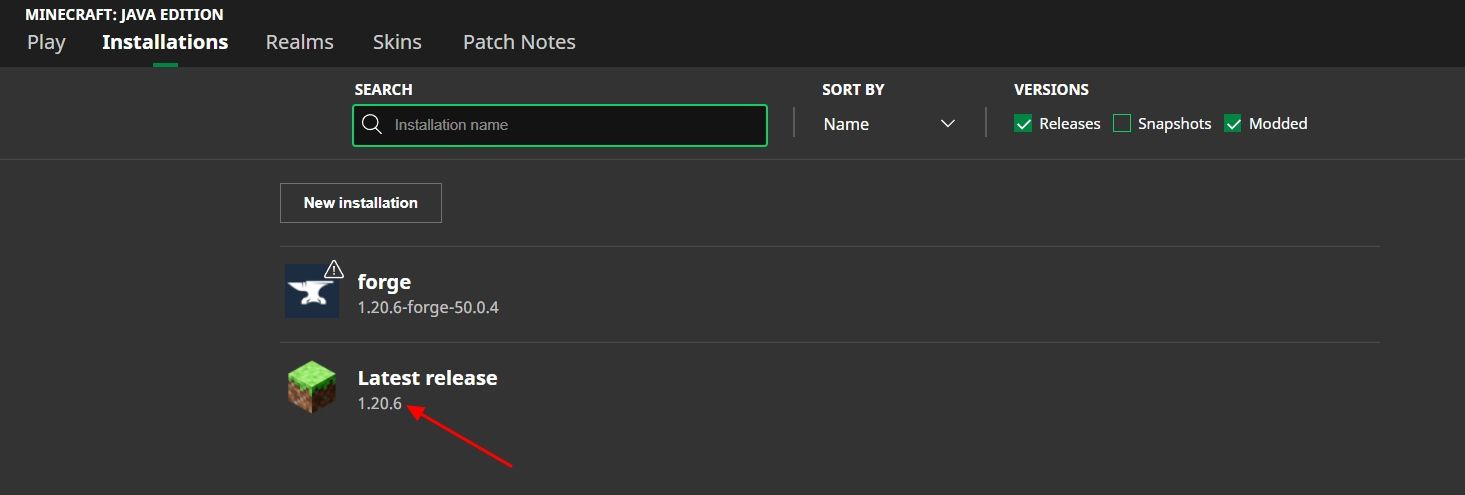
Next, open the Run dialogue box by pressing the Windows+R shortcut key, type %appdata% in the search field, and click “OK.”
In the Roaming folder that opens up, navigate to .Minecraft > Mods.
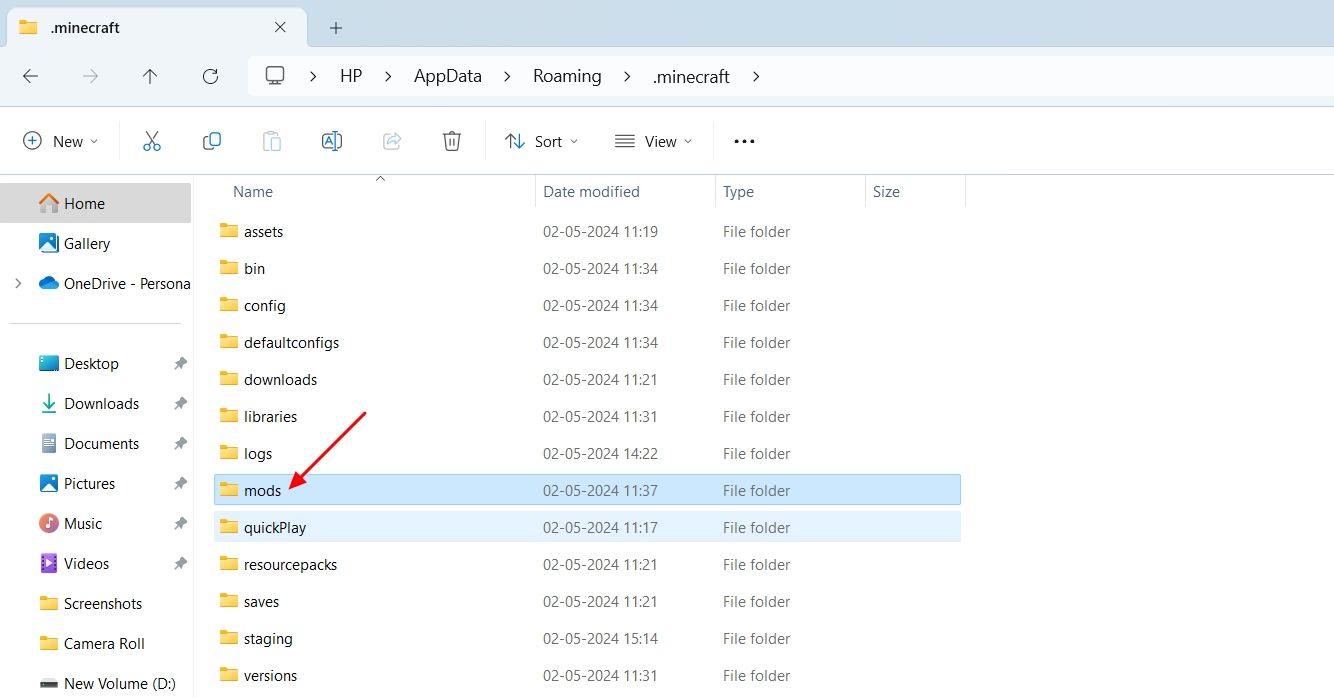
In the mods folder, go through the names of all the mods and check the version number. If you find a mod with a different version number than the Minecraft version installed on your computer, it’s probably the culprit behind the error.
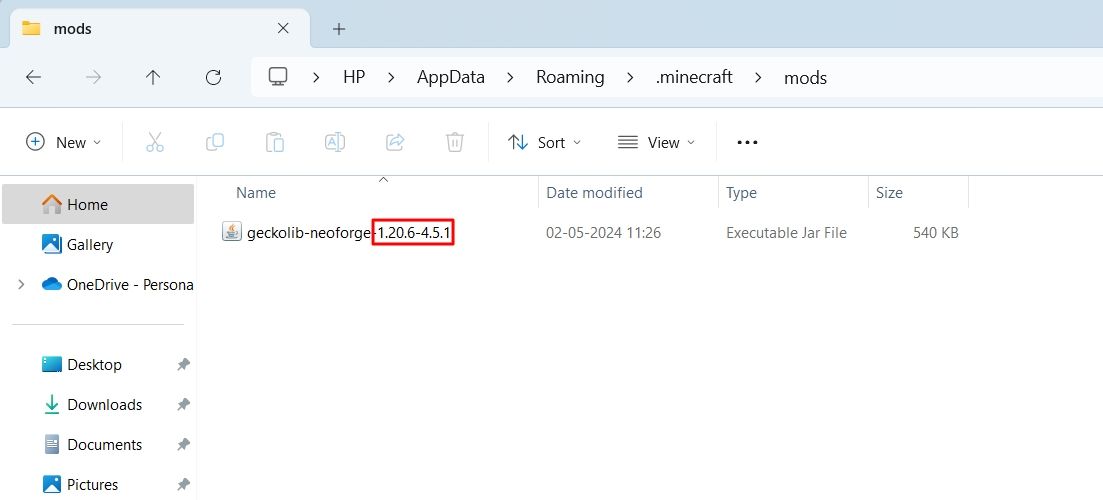
You’ll need to replace that mod with its latest version to fix the problem. For this, take note of the name of that mod, and then visit the CurseForge website . Type the name of that mod and hit the search icon.
![]()
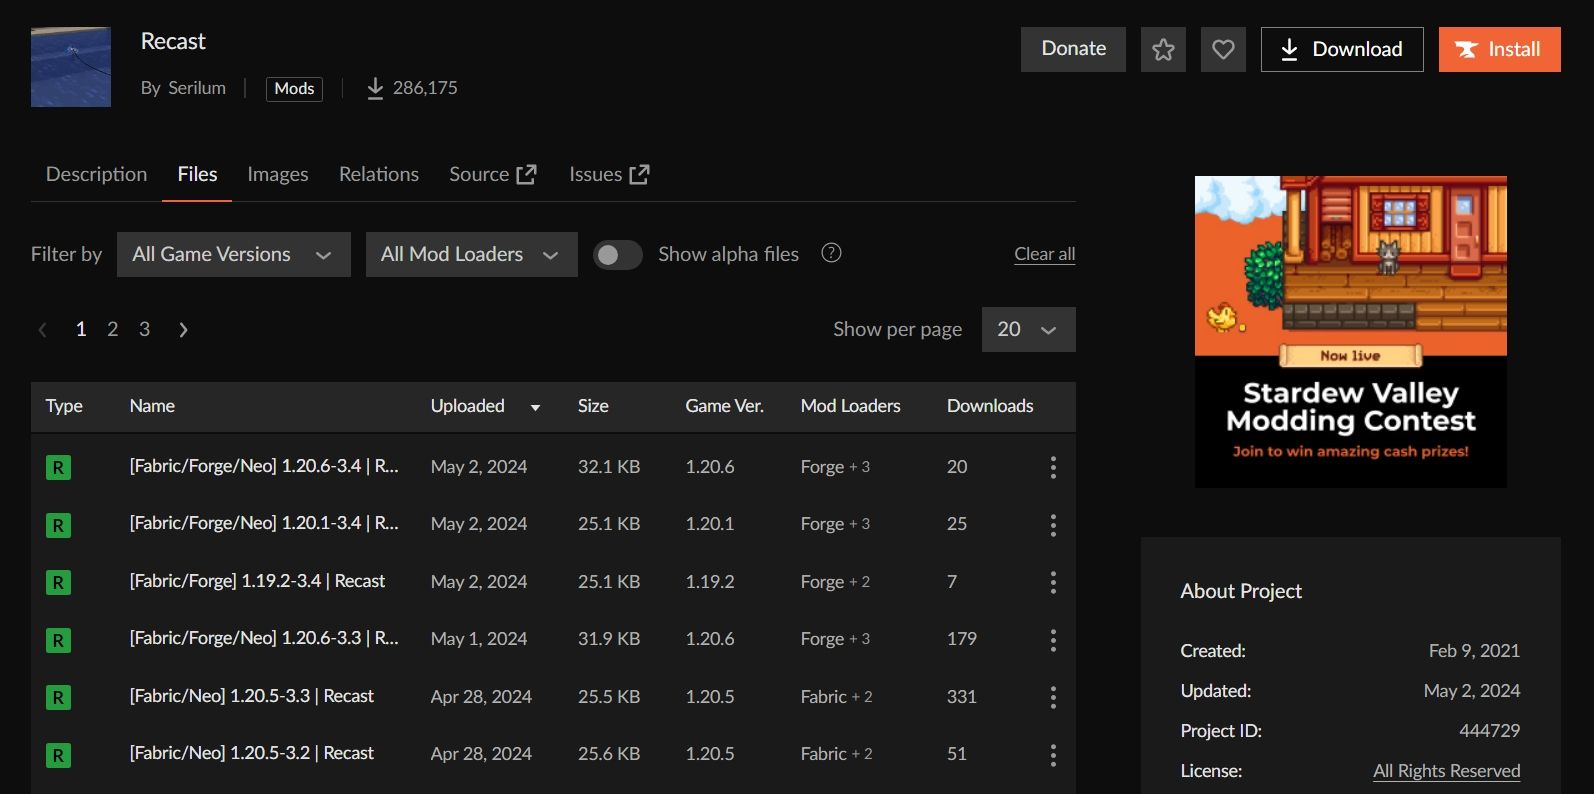
Choose the relevant mod from the result that appears. Switch to the “Files” tab. You’ll see different versions of that mod. You need to click on that version which corresponds with the version of Minecraft you’re using.
Click the “Download” button.
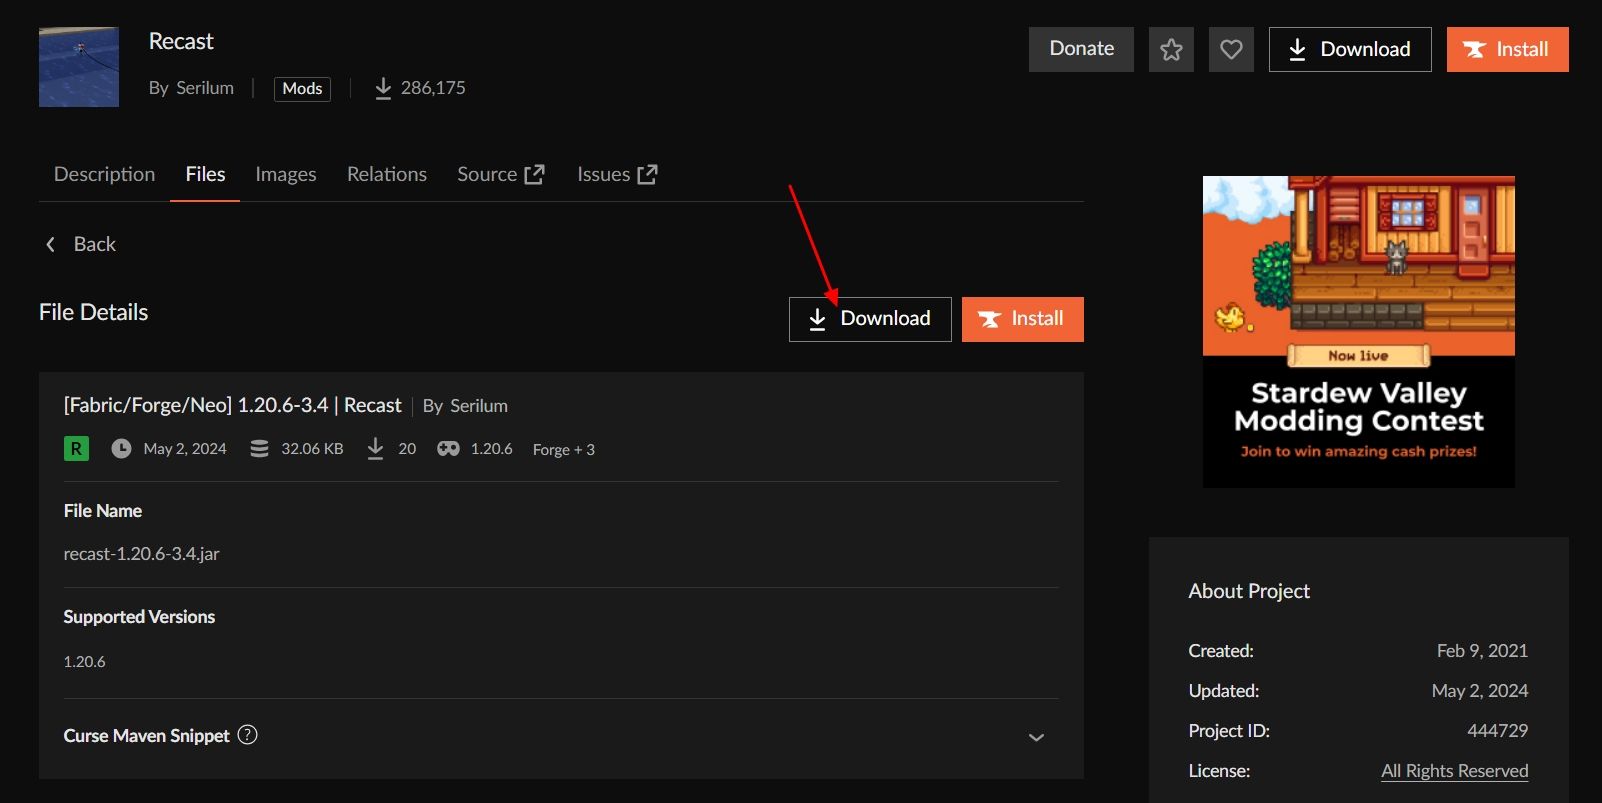
After that, replace the new downloaded mod with the old problematic version, which is present in the mods folder. Then, restart your computer and try launching Minecraft again.
Detect and Delete the Problematic Mod
The error message can also occur even though the mods you are using are up-to-date. In this case, the problem might be with a particular mod’s files. That mod might be conflicting with Minecraft and causing the issue.
To find the culprit mod, go to the Minecraft mods folder and move all of your mods to a different location. Then, start moving each mod back to the mods folder one at a time and launch the game after adding each mod. You’ll need to do this to identify which mod causes the Exit Code 1 error after adding it back to the folder.
Once you’ve identified the mod that causes the error, you can delete it from your computer. And if you want, you can also report the issue with that mod on its dedicated page on the CurseForge website.
Update Your Graphics Driver
Having the latest version of a graphics driver installed on your computer can solve all sorts of problems. If your computer is running an extremely old version of your graphics driver, you could face different graphics-related issues on your computer, including this one.
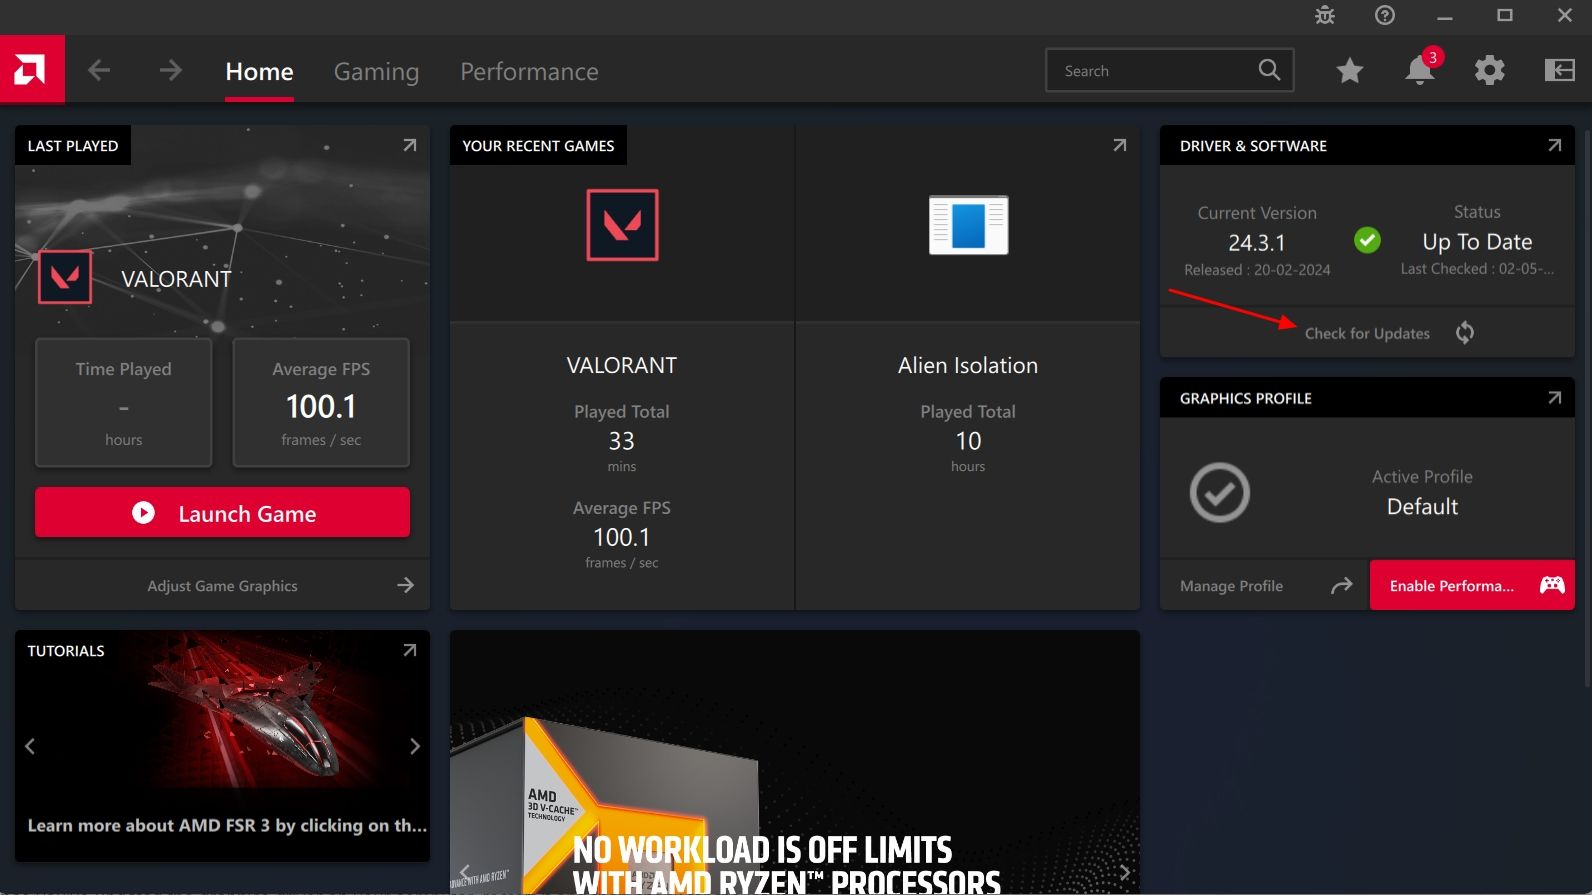
You’ll have to update your graphics driver to fix the problem. If your computer features an AMD graphics driver, download and install the AMD Software Adrenaline Edition . After that, click the “Check for Updates” button in the Home tab. The program will check for any available updates for the AMD graphics driver and install it automatically on your computer.
If your computer has an NVIDIA graphics driver, download and install the GeForce Experience app or the newer NVIDIA app . Switch to the “Drivers” tab and click the “Check for Update” button. The program will go online to check for updates to your NVIDIA graphics driver . If it finds any, you will be given the option to download it.
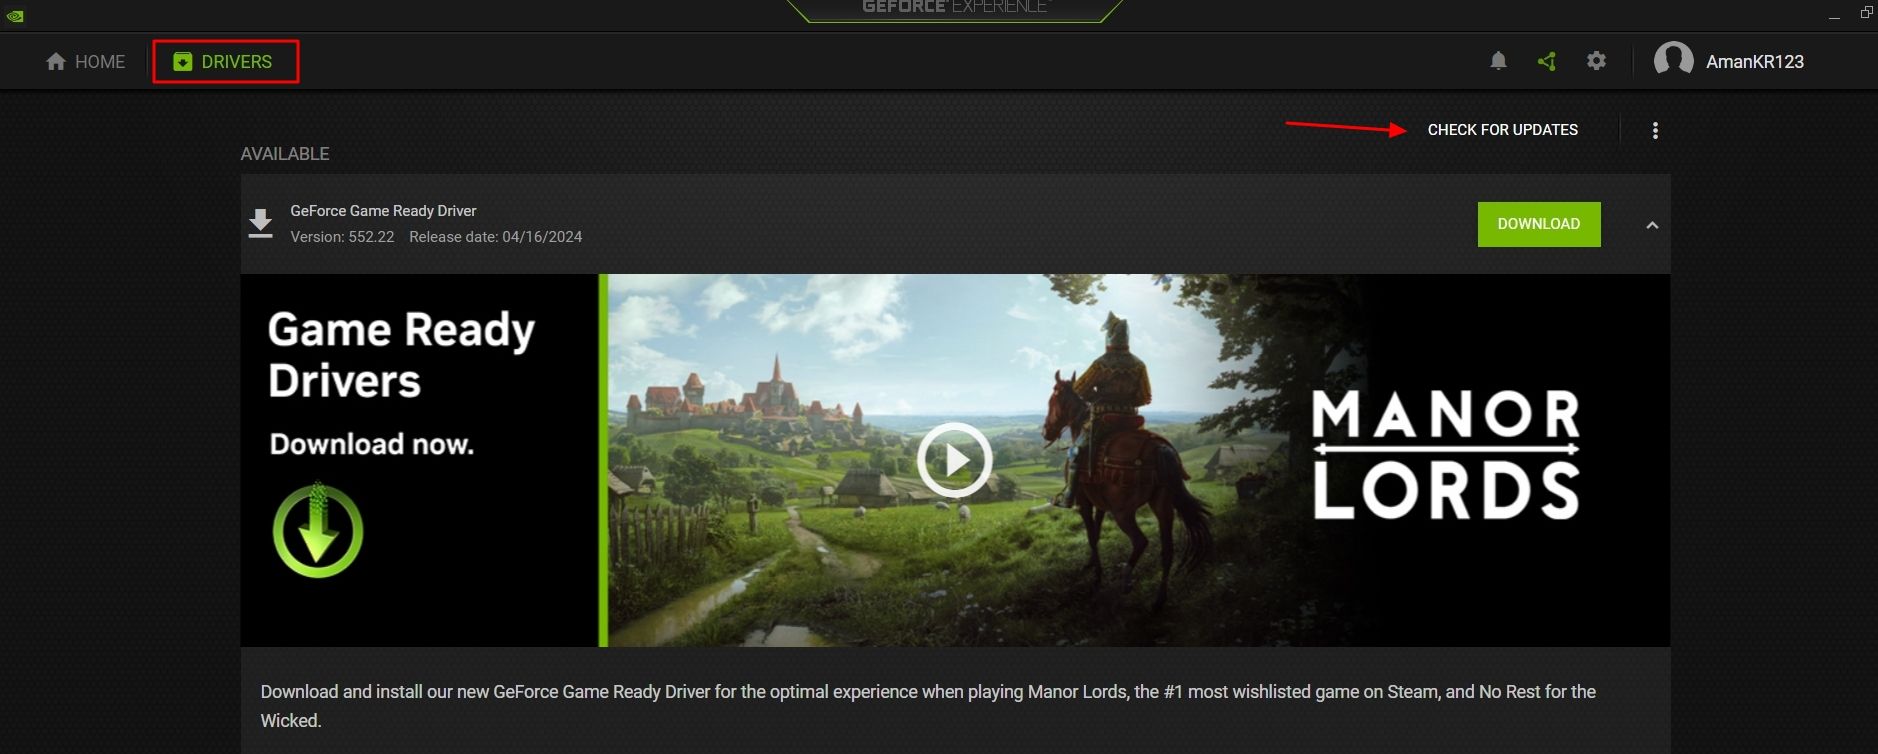
Click the “Download” button next to the Game Ready Driver.

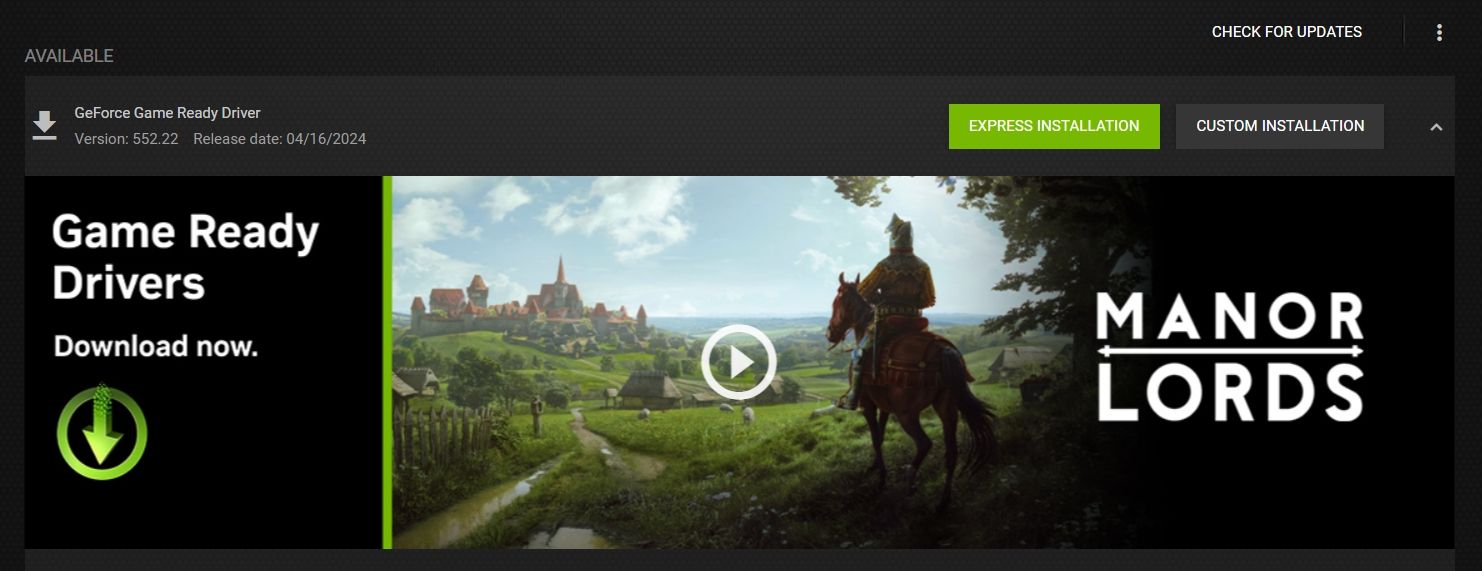
Once the download process is complete, choose the “Express Installation” option and then follow the on-screen instructions to complete the NVIDIA graphics driver installation process.
If you have an Intel graphics driver, you can visit the Intel official website and download the latest update for your graphics driver. The downloaded file will be in an executable format, which you can install like any other Windows application.
Once you’ve updated the graphics driver on your computer, restart it and launch Minecraft to check for the issue.
Edit the Minecraft Launcher Path
The Exit Code 1 error can also occur due to your Windows username if it contains any special characters. These special characters can sometimes prevent the Minecraft launcher from finding the game directory, which ultimately results in the error.
The solution, in this case, is to edit the Minecraft launcher path, which will instruct the game launcher to ignore the special characters in your username.
To do this, right-click the Minecraft launcher shortcut and choose “Properties.” Then, in the Shortcut tab, click the “Target” field and type the following command after the existing file path:
`-workDir %ProgramData%.minecraft`
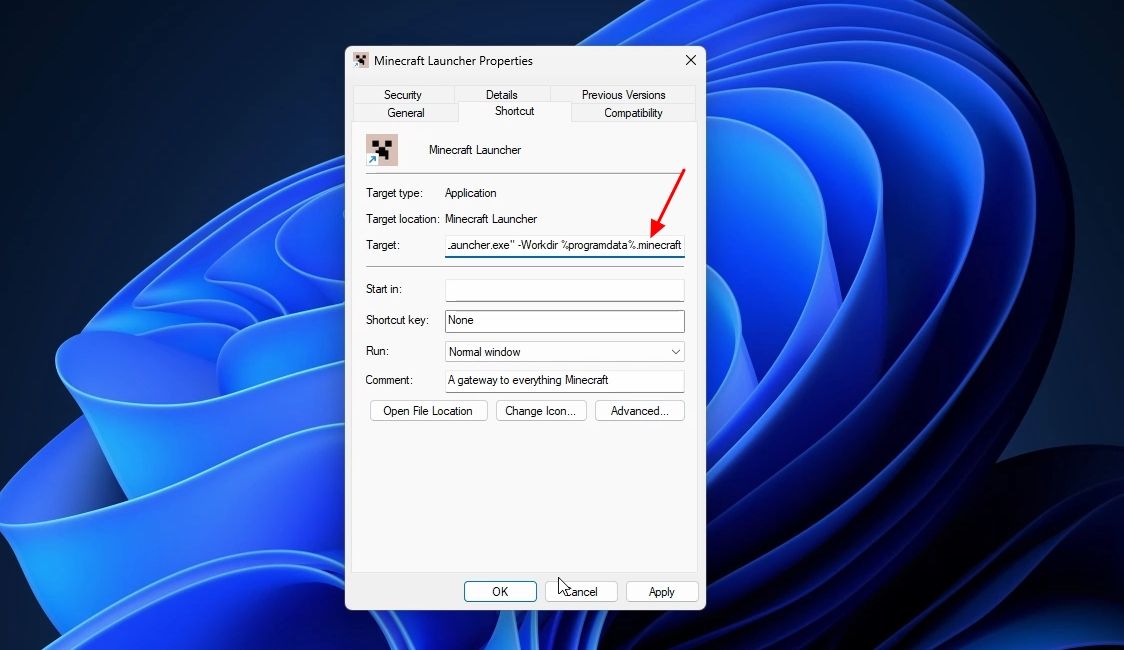
Click “Apply” and “OK.”
After that, restart your computer and check for any improvements.
Change the Java Executable File
Whenever you install Minecraft, it automatically installs the required Java Runtime Executable (JRE) on your computer and uses it to run the game. However, there may be instances where the launcher fails to detect the JRE, or perhaps it’s searching in an incorrect location.
You can prevent this from occurring by manually selecting the JRE in the launcher. To do this, open the Minecraft launcher, choose “Minecraft Java Edition” from the left sidebar, and click “Installations” on the right.
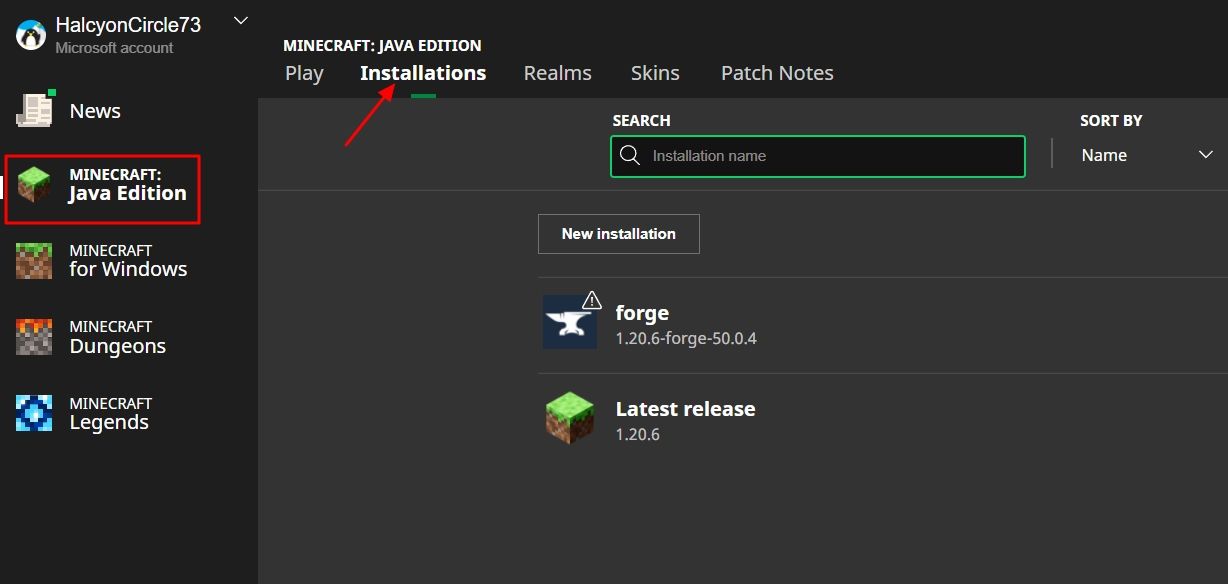
Click the three dots next to the “Latest release” entry and choose “Edit.”
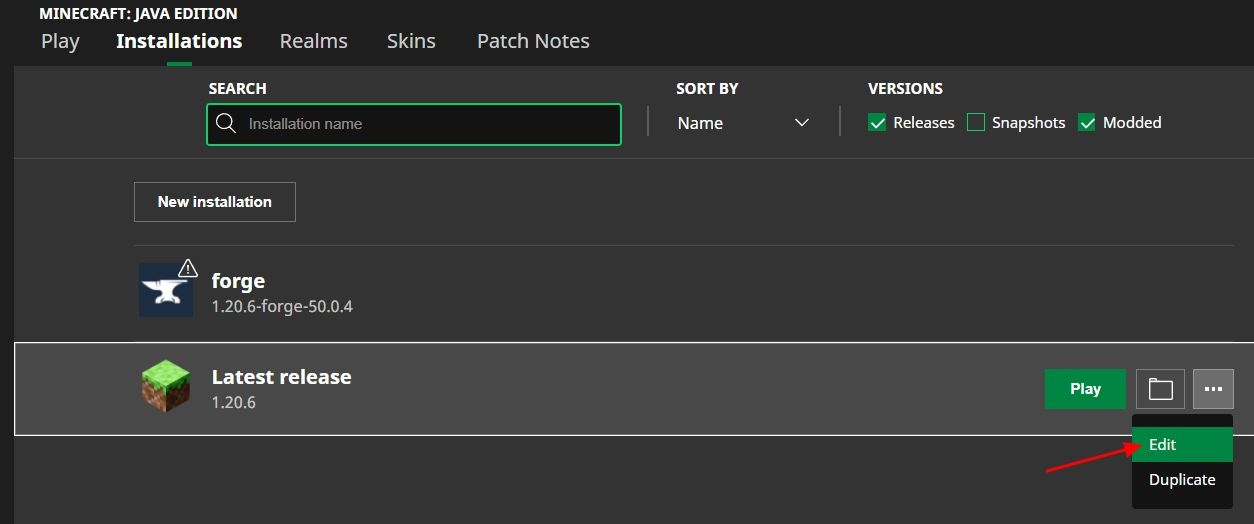
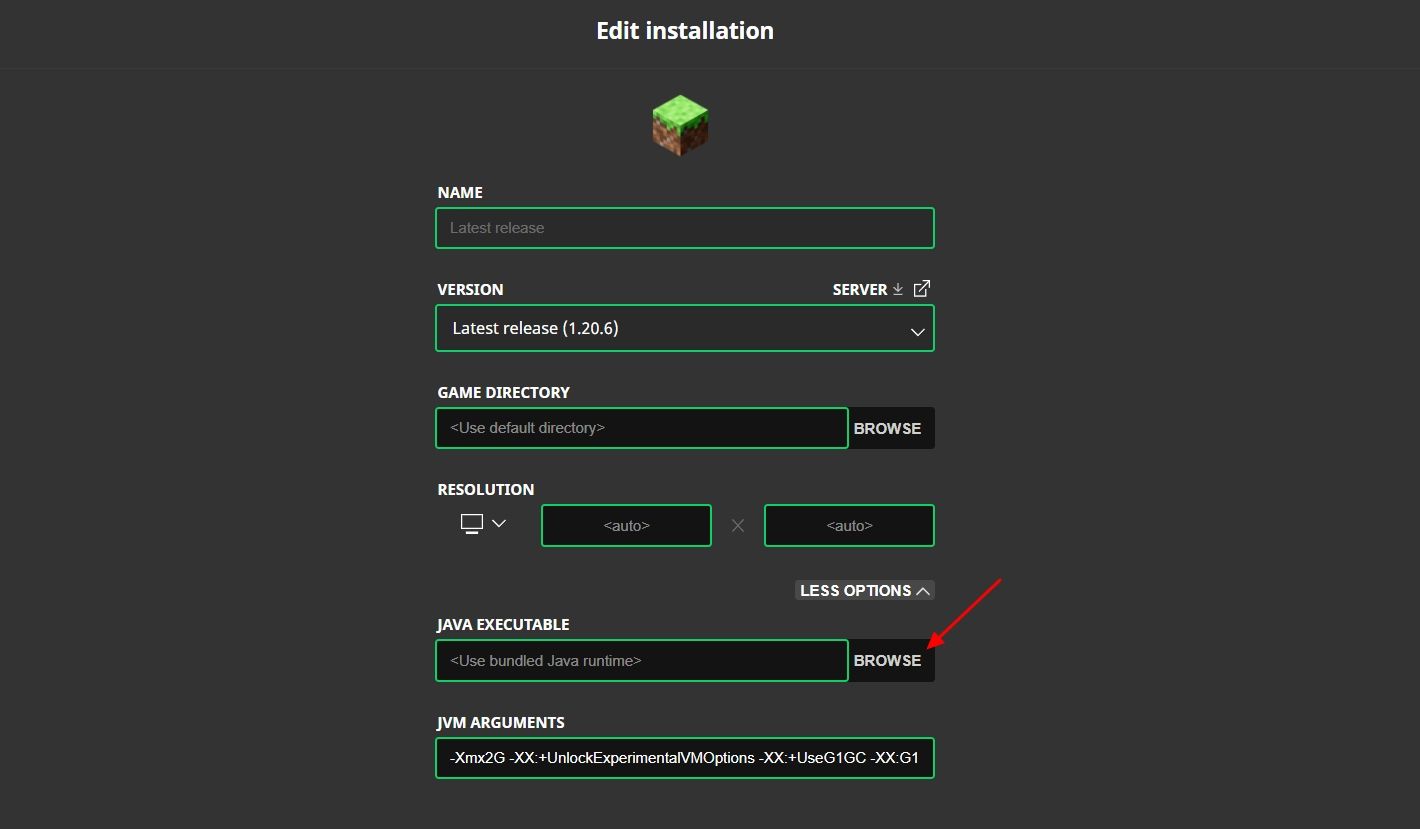
Click “More Options.” Then, click the “Browse” option.
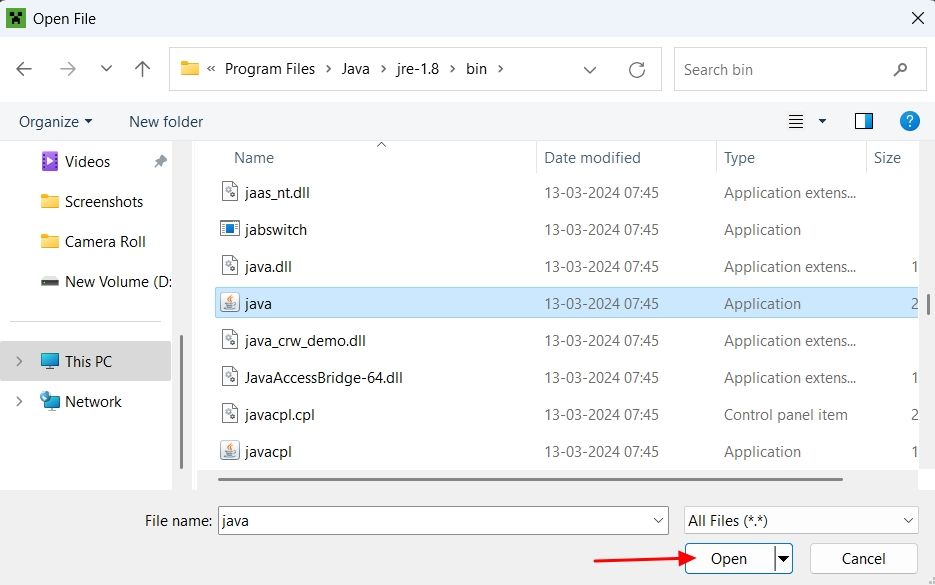
If you haven’t modified the Java installation path, then navigate to the following location and select the “Java.exe” file. Then, click “Open.”
`C:\Program Files\Java\jre-1.8\bin`
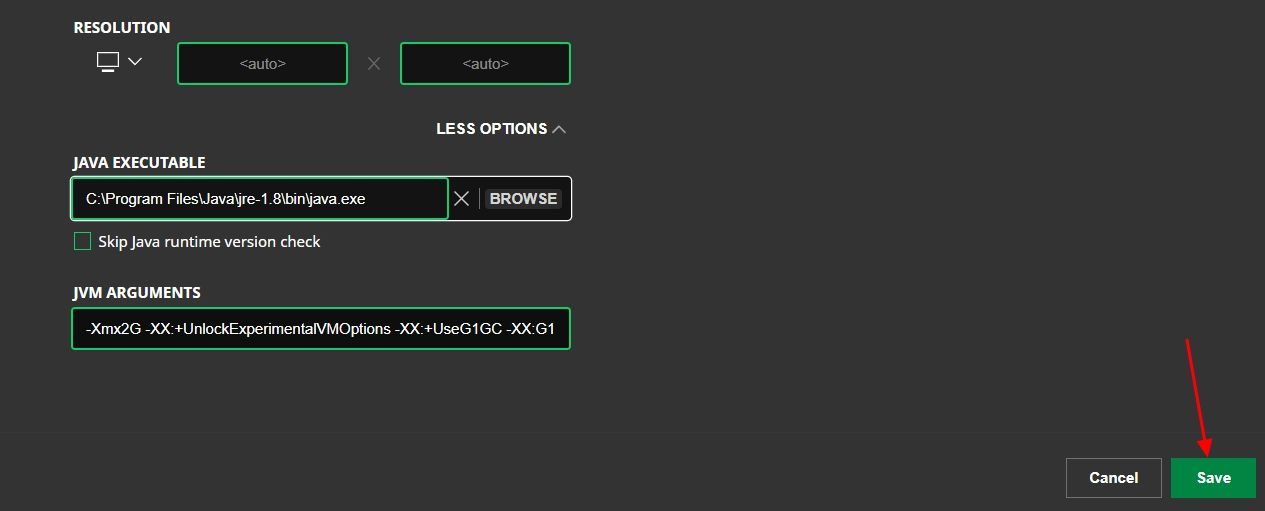
Click the “Save” button.
Now, restart the game and check for the issue again.
Reinstall Minecraft
If none of the above solutions have helped to fix the problem, the last thing you can try is to reinstall Minecraft. But before you do that, you can keep your Minecraft data somewhere safe so you don’t lose it even after reinstalling Minecraft. To back up your Minecraft progress, open the Run dialog box, type %appdata%, and hit Enter. Then, open the “.Minecraft” folder.
Copy the “Save” folder and paste it somewhere safe on your computer.
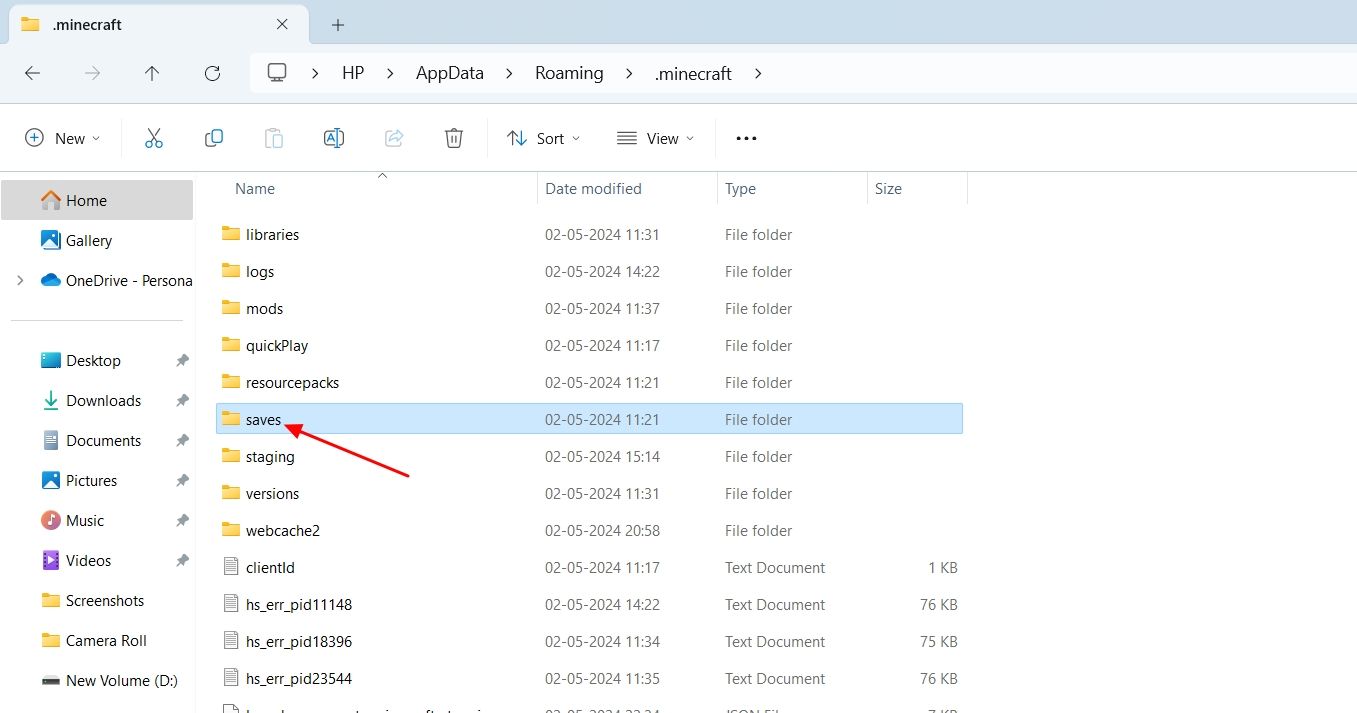
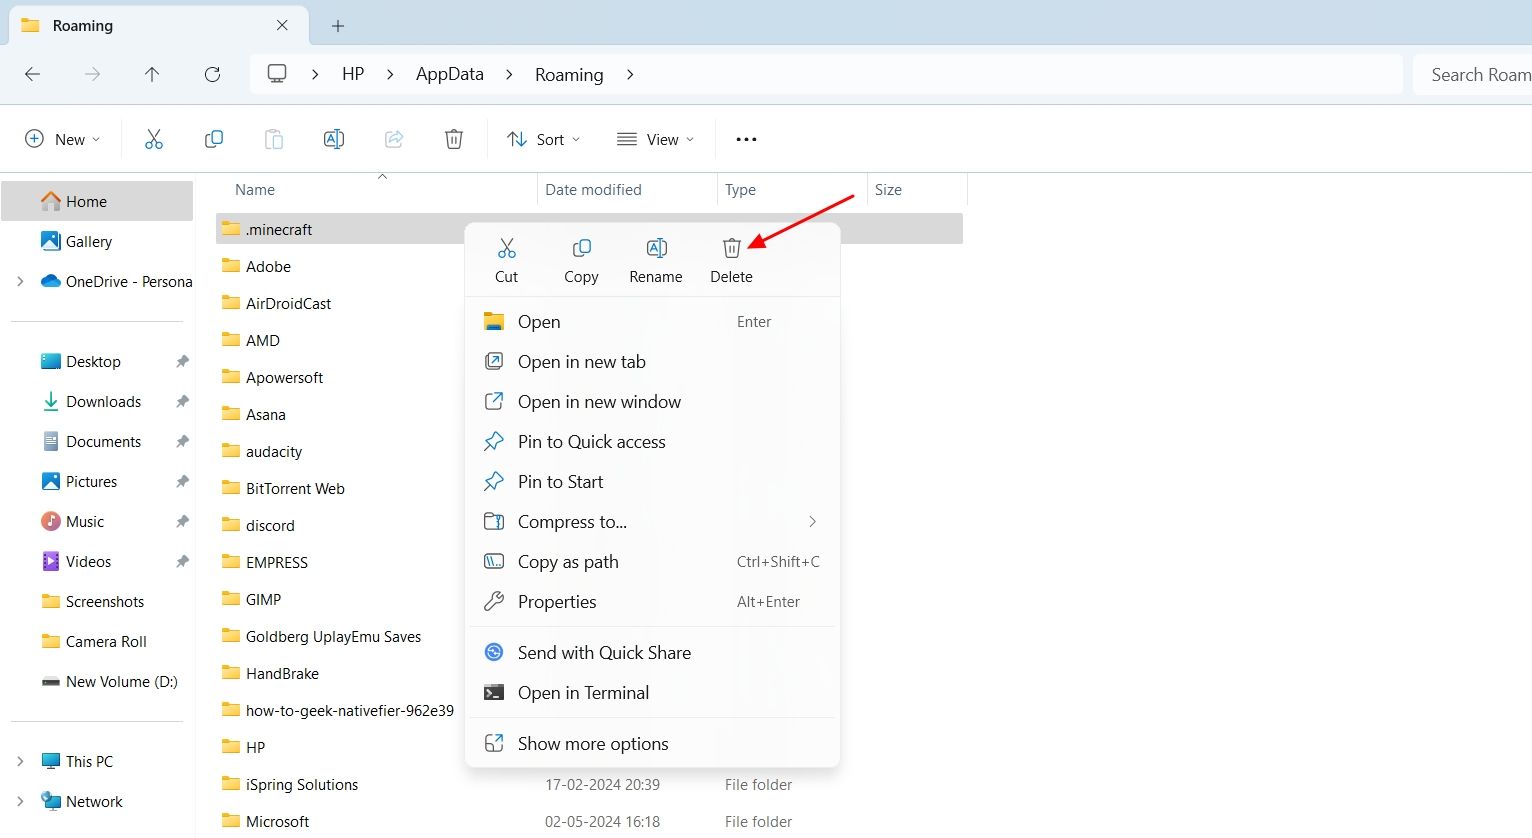
After that, return to the “Roaming” folder, and delete the “.Minecraft” folder. This will uninstall Minecraft from your computer .
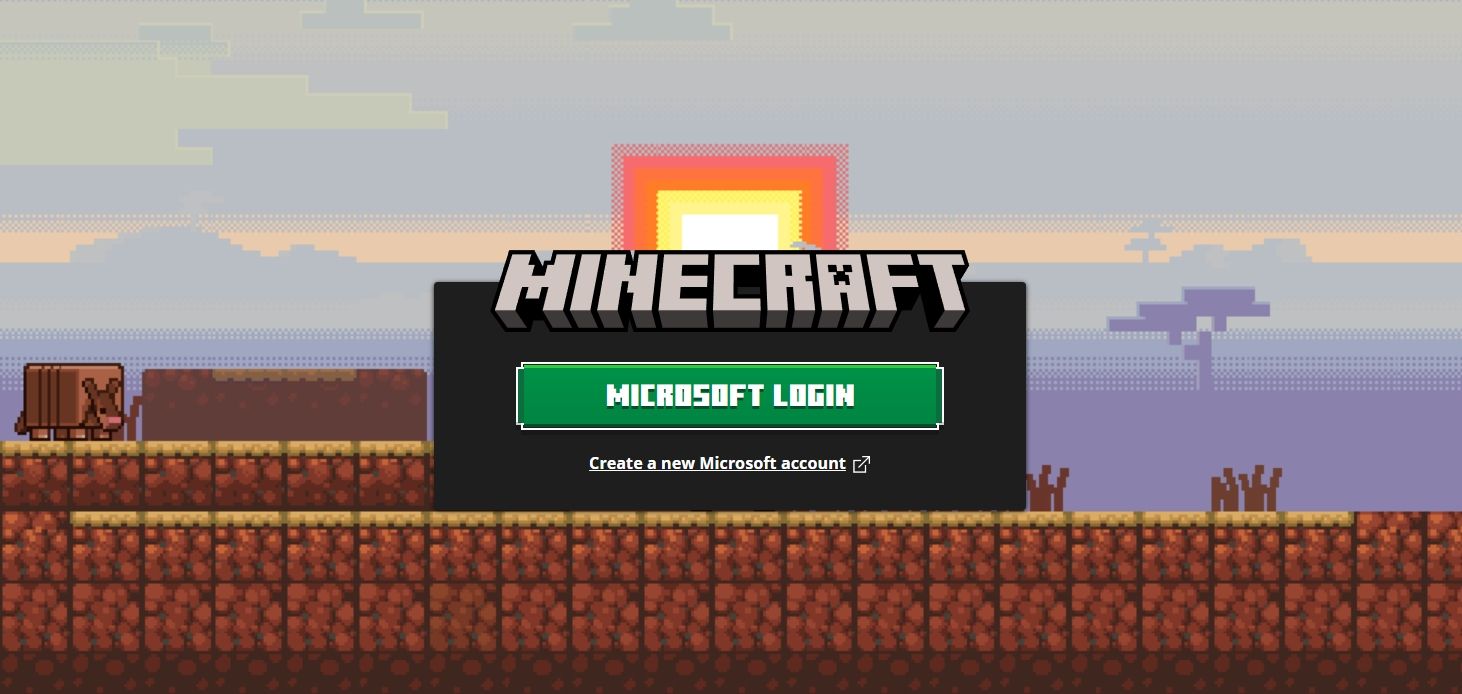
After that, restart your computer and open the Minecraft launcher. Then, log in with your Microsoft account and follow the instructions to install the game on your computer.
Once you have installed Minecraft, you can move the “Saves” folder to the following location:
`C:\Users\[YourUsername]\AppData\Roaming\.minecraft`
Then, restart Minecraft, and you should no longer be facing the problem.
If you play Minecraft as a way to relax from your busy schedule, you’re going to get frustrated if you run into Exit Code 1. But if you had followed the above methods correctly, this issue should have been fixed by now. However, in the worst case, if you’re still having trouble, you can reach out to the Minecraft support team for further help.
Also read:
- [New] 2024 Approved Streamlined Approaches for Zoom Utility on Chromebook
- [New] Expert Selection Top 5 Free Tools for Extracting Pin Videos
- [New] Harnessing Customer Stories for Brand Growth
- [New] Precious Chrome Companion Ringtones
- [New] Transform Your YT Prompts with Green Savvy
- [Updated] Xbox One Zoom Integration Essential Tips
- 2024 Approved Explore the Art of iPhone Photo Collage Assembly
- 2024 Approved Harmonize with InShot's Music Load Functionality
- Expertly Charged Hero5 Black Batteries - Authenticity & Counterparts for 2024
- How to Fix Windows Update Error 0X8024402c [Solved]
- How to Make a Fortune on Reddit Without Experience - Top 13 Methods for 2024
- In 2024, Fast Track Choosing Best PC Game Speed Extensions
- Jumpstart Your Channel’stopwatch-Seeking Viewers with These YouTube SEO Essentials
- The Power Trio of Social Media Plus YouTube - An Overview
- Title: Troubleshooting Guide: Solving Minecraft Crash Error with Exit Code 1 on Windows
- Author: Frank
- Created at : 2025-02-12 20:42:04
- Updated at : 2025-02-19 16:34:56
- Link: https://some-techniques.techidaily.com/troubleshooting-guide-solving-minecraft-crash-error-with-exit-code-1-on-windows/
- License: This work is licensed under CC BY-NC-SA 4.0.