
Step-by-Step Guide: Discovering and Organizing Images on Your Windows 10 Computer

Step-by-Step Guide: Discovering and Organizing Images on Your Windows 10 Computer
Quick Links
- How to Find All Your Photos Manually
- A Better Way: Let Windows Search Find All Your Photos
- Use a Third-Party App
Key Takeaways
- Use File Explorer’s search function to find all your photos on your PC. Navigate to the drive you want to search, click the search box at the top right, then enter kind:=picture into the search field.
- Alternatively, you can use a third-party app like WizTree to find image files. Scan your hard drive, apply a filter to search for specific image file formats, and then browse through your images.
- Remember to move your photos to a more specific folder or back them up on an external storage device to avoid losing or forgetting them again.
Have you ever transferred some pictures to your PC and then forget where you stored them? Or, maybe you’ve got a few storage hard drives and don’t want to search them manually? Here’s a simple way to get Windows to search for all your photos on your computer.
How to Find All Your Photos Manually
Unfortunately, pictures get stored in different places on your PC depending on the where they come from. Windows itself stores images in your “Pictures” folder. Some syncing services try to respect that, but you’ll often find pictures transferred from things like DropBox, iCloud, and OneDrive in their own folders. If you transfer pictures from your camera or another device directly to your PC, those pictures also can end up in different places depending on the transfer method. And if you download pictures from the internet, they’ll usually end up in whatever download folder your browser is set to use.
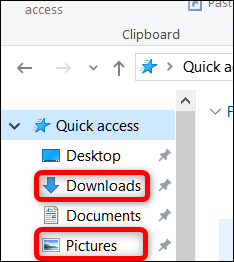
If you’re feeling adventurous and want to search for your photos manually, the first two places you should look are your “Downloads” and “Pictures” folders, both of which you’ll find in the “Quick Access” section of the pane on the left of a File Explorer window.
A Better Way: Let Windows Search Find All Your Photos
File Explorer has a quick trick for searching for different types of documents. It’s not exactly hidden, but most people never bother with it.
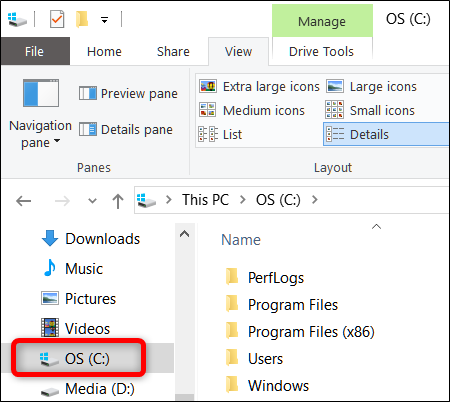
Open up File Explorer and navigate to the location you want to search. You can search your entire PC by selecting the “This PC” entry in File Explorer’s navigation pane.

You can also search a particular hard drive or folder. For this example, we’re going to search our C: drive.
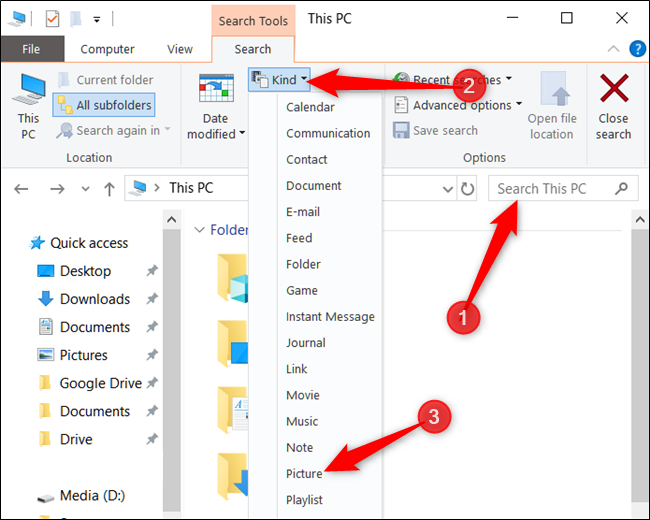
Next, click the search box at the top right of the window. Doing so will display the otherwise hidden “Search” tab at the top. Switch to that tap, click the “Kind” button, and then select “Pictures” from the drop-down menu.
That inserts the following operator into the search box. If you prefer, you can also type it there yourself to get the same results.
kind:=picture
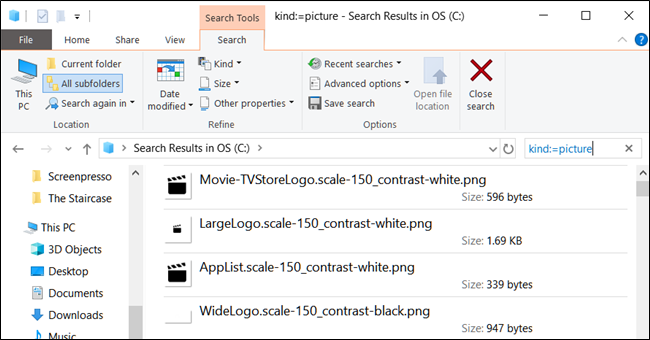
As you can see, the results return everything from pictures used by the system to personal pictures contained within the folder and all its subfolders. The search includes images saved in JPG, PNG, GIF, and BMP formats, which are the most common formats used. If you’ve got pictures stored in another format, like RAW, you’ll have to find them another way.
The search I ran on my C: drive came back with 27,494 pictures.

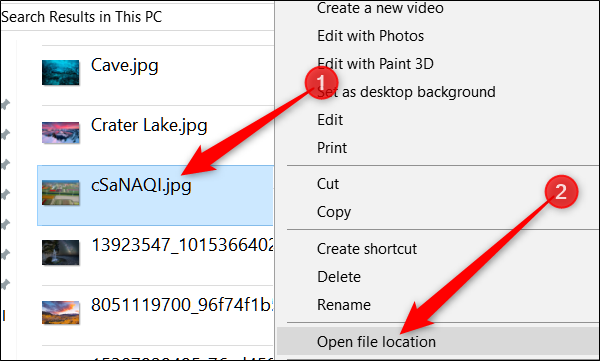
Once you’ve located the picture(s) you were looking for, you can right-click it, then select “Open File Location” to open the folder where it’s contained.
Use a Third-Party App
You can also use a third-party app, like WizTree , to find image files. Launch or install the app, then click “Scan” to analyze your hard drive and create an index of all of your files.
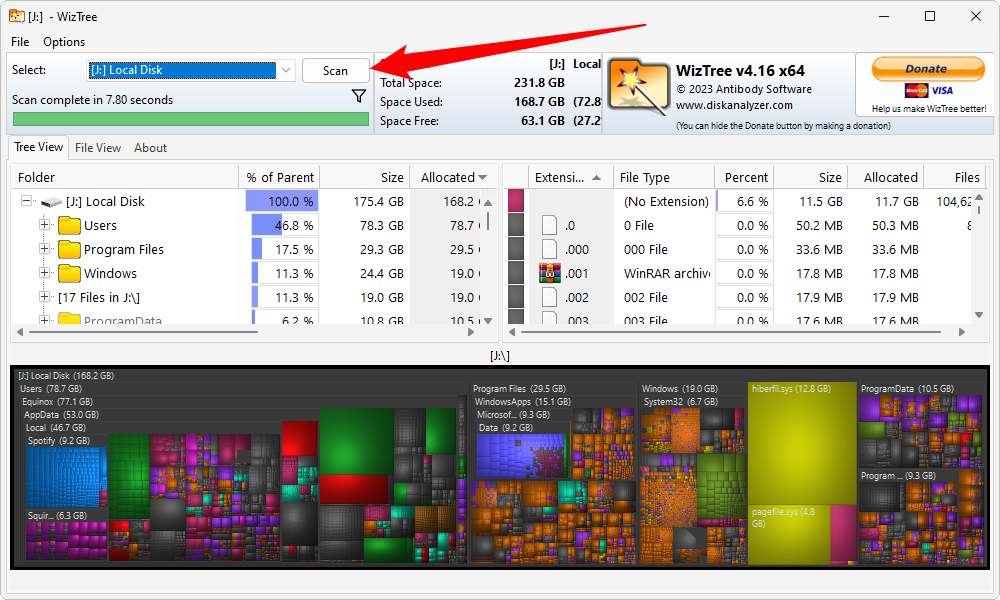
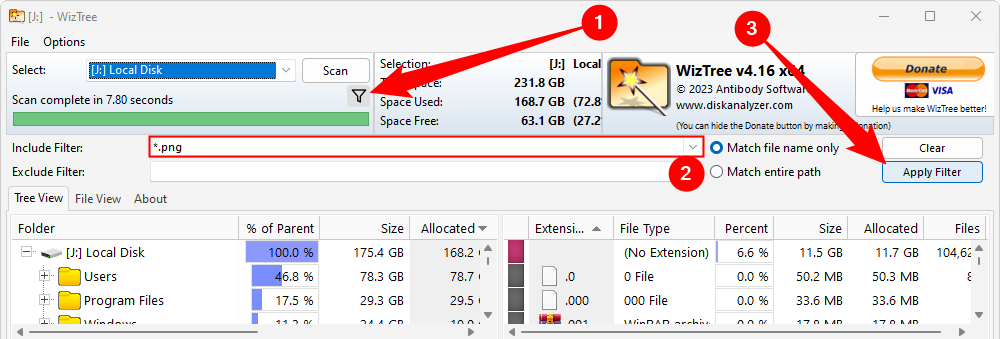
Once it is done you’ll see a colorful array of blocks at the bottom that represent the files and folders on your PC. Click the filter button at the top, enter *. followed by an image file format, then click “Apply Filter.” If you wanted to find every PNG file, for example, you’d enter *.png into the filter field. If you wanted to find JPEGs, you’d enter *.jpeg into the filter field instead.
The asterisk (*) is used as a wildcard character. In our case, it tells WizTree: “Look for a file with any name that ends in a specific file format.”
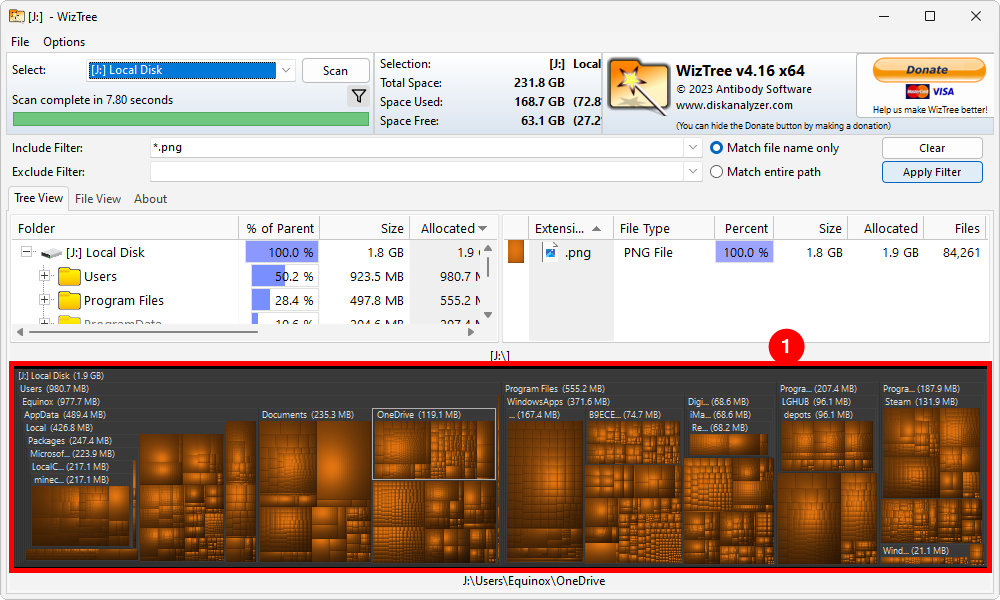
The colored blocks at the bottom will now only represent image files (in our case PNGs). You can click on them one by one, or open entire folders.
PNGs and JPEGs aren’t the only image formats, though. Here are some common ones you might want to look for:
- JPEG (.jpeg)
- JPG (.jpg)
- PNG (.png)
- BMP (.bmp)
- GIF (.gif)
- WEBP (.webp)
- HEIC (.heic)
- AVIF (.avif)
After you’ve located all the photos stored on your computer, you can move them to a more specific folder—like Pictures—or back them up on an external storage device where they hopefully won’t get lost and forgotten again.
Also read:
- [New] From Airplay to Download Apple Podcasts Simplified
- [New] From Pixels to Perfection The Advantages of Srgb over Rgb
- [New] In 2024, Key Principles of Metaverse Commercial Strategy
- [Updated] Excellence in Image Making via Premium Grid Makers
- [Updated] Infusing Audio From YT Into Video Artistry
- 2024 Approved Ideal Top 7 Video Apps for Apple Devices
- Convert Your FLV Files for Free - Change to AVI, WMV, MP4 or MP3 with Our Top-Ranked Converter Tool!
- From Idea to Execution Creating YouTube Trailers in Filmora
- Harmonizing Visuals & Sounds with Canva's Audio Features for 2024
- In 2024, Detailed guide of ispoofer for pogo installation On Vivo S17 Pro | Dr.fone
- In 2024, Non-Game Console Apps Excelling at Game Recordings
- In 2024, Unveiling the Potential of Today's Drones for Tomorrow
- Planning to Use a Pokemon Go Joystick on Xiaomi Redmi Note 12 Pro+ 5G? | Dr.fone
- Title: Step-by-Step Guide: Discovering and Organizing Images on Your Windows 10 Computer
- Author: Frank
- Created at : 2025-02-16 19:41:16
- Updated at : 2025-02-19 18:15:12
- Link: https://some-techniques.techidaily.com/step-by-step-guide-discovering-and-organizing-images-on-your-windows-10-computer/
- License: This work is licensed under CC BY-NC-SA 4.0.