![[New] Guidelines for Reducing Shake in Mobile Videos](https://thmb.techidaily.com/dccb34317888d85bf5b03242f6ff077822b2720dd93141b57f6f0f2fbe555fd1.jpg)
[New] Guidelines for Reducing Shake in Mobile Videos
Guidelines for Reducing Shake in Mobile Videos
Stabilize Shaky Videos After Recording Easily
Wondershare Filmora is one of the most popular video editing software among YouTubers , which provides the video stabilization tool to remove shake from videos within one-click. Download and have a try now.
No matter how eye-catching your subject is or how fantastic your clip is, viewers will quickly lose interest if the video is choppy. They’re simply unprofessional and annoying. If you wish to enhance your photography skills, especially with your iPhone, you’ve come to the right place.
This post will teach you some ways to stabilize iPhone video. Let’s explore how you can transform your film from beginner to professional—or, at the very least, somewhere in between—with a few approaches and a few tools!
In this article
01 Use Handheld Stabilizers to Shoot Stable on iPhone During Recording
02 Shoot with Camera Apps to Stabilize
03 Stabilize Video with Best Free iPhone Video Stabilizer Apps After Recording
04 Tips for Shooting Stable Videos with iPhone

Part 1: Use Handheld Stabilizers to Shoot Stable on iPhone During Recording
With stabilizer tools, you can improve the quality of all your memories. They are many and manufactured by several firms, but your interactions with friends and family are priceless. We will look at two of the best:
 Epubor Audible Converter for Win: Download and convert Audible AAXC/AA/AAX to MP3 with 100% original quality preserved.
1. DJI Osmo Mobile 4
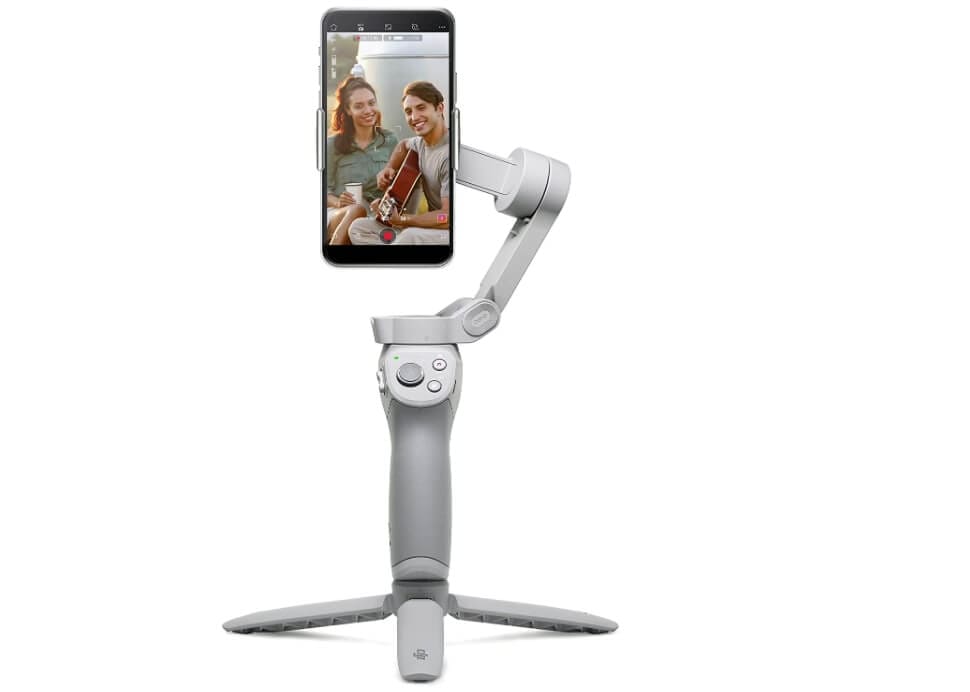
A gimbal stabilizer employs sensors and motors to maintain your device level. As a result, it considerably minimizes the requirement for video stabilizing post-processing. The DJI Osmo Mobile 4 is a good choice for gimbal stabilizers. Link your smartphone to the spring-loaded clip, switch on the gimbal, and the stabilizer will do its magic—or science!
The ActiveTrack function is one you’ll like because it works well for stabilizing photos and maintaining the subject in the frame. Simply because of this capability, the DJI Osmo Mobile 4 is ideal for vlogging and live to broadcast. It also provides dramatic and dolly zoom effects, which are likely to enhance the quality of your recordings. And it has a landscape orientation feature that other gimbal stabilizers do not have.

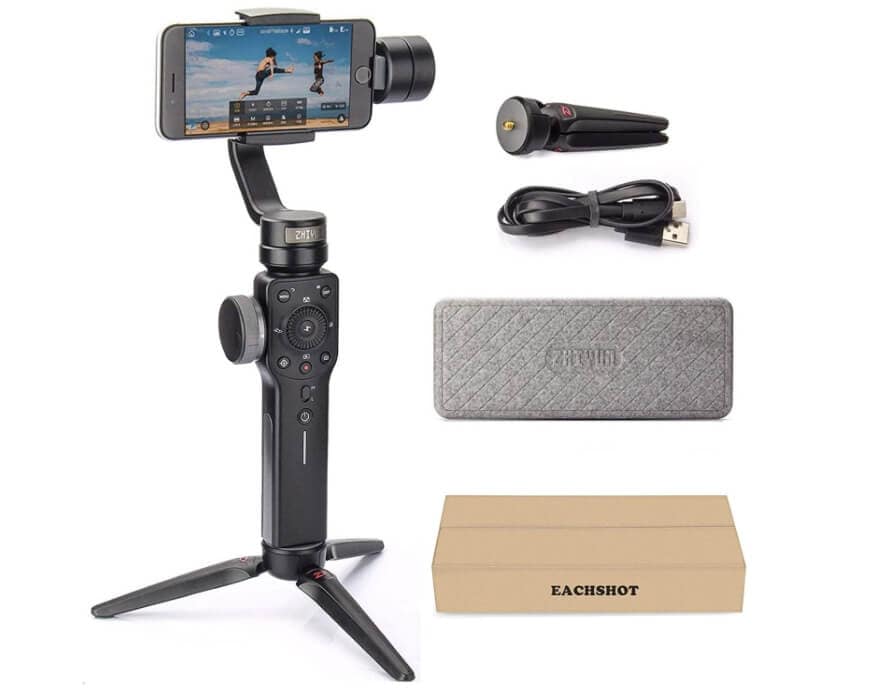
2. Zhiyun Smooth 4
This popular three-axis gimbal is capable of meeting your stabilization requirements with high-quality results. It enables users to manage the device from afar via a specialized remote application, and it also allows for 360-degree movement without interfering with the video. Professionals consider its battery life one of its most significant features, as it can easily last 3 to 4 hours.
It has a Zero Noise function, which is popular among professionals. It provides 360-degree rotation with excellent stability. Furthermore, the device has an intelligent face track function that gives amazing video stabilization.
This Stabilizer is suitable for smartphones that are less than 6.0 inches in size. Bluetooth connectivity allows you to control the device with your phone using the dedicated app. Don’t let its light weight fool you because Zhiyun Smooth 4 is solidly built.

Part 2: Shoot with Camera Apps to Stabilize
Well, if you don’t want to purchase any gimbal, you can try some camera apps to capture a stabilized video directly on your iPhone.
1. FiLMiC Pro
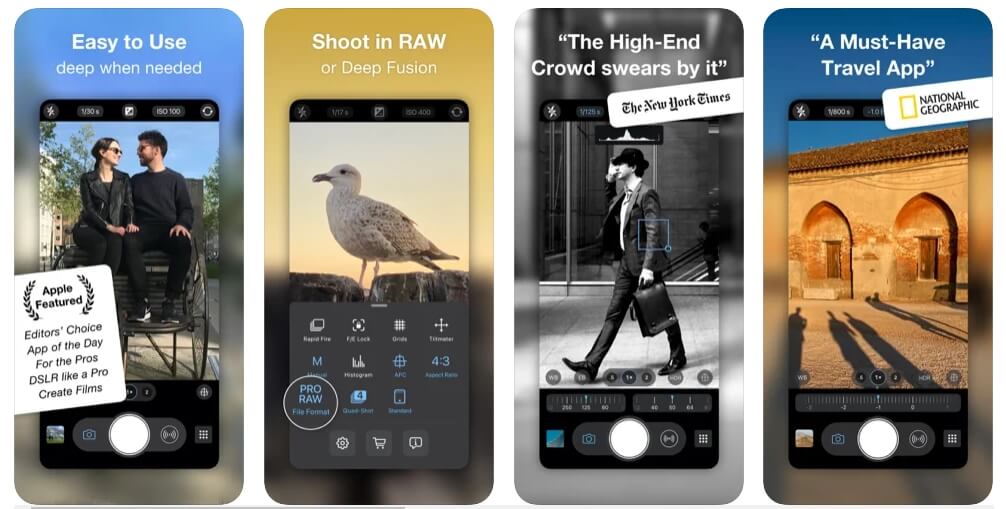
FiLMiC Pro is amongst the most enhanced mobile cinematic video camera ever. FiLMiC Pro is the most responsive manual filmmaking app available on mobile, with cutting-edge capabilities. FiLMiC Pro has been named iOS Video Camera App of the Year. It has been utilized in more high-profile video productions by award-winning producers than any other app.
FiLMiC Pro also has a selection of dramatic film looks that may be done in-camera at the time of shooting to create a fully cinematic style without the need for post-production grading. So, you can use this camera app to capture stabilized videos on your iPhone.
2. ProCamera
ProCamera is intended to be a go-to camera app that is simple to use in everyday settings while still being deep and multipurpose for special events and expert use cases. It gives you complete control over your iPhone camera, yet it never gets in the way of shooting an image. ProCamera not only delivers pro-level DSLR camera functions but also has a high-end video capture mode and extensive editing tools.
This camera app offers a beautiful stabilization to the video. You can also add stabilization to the video after capturing it with the help of the stabilization tool present in this application. Moreover, every component of ProCamera has been intended to capture the moment flawlessly every time you press the shutter button.
### 3\. [Camera+ Legacy](https://apps.apple.com/us/app/camera-legacy/id329670577)

Whether you’re a professional photographer or have never held a camera before, Camera+ will make you fall in love with snapping images and recording movies. It enables you to set exposure independently of focus. You can now quickly adjust how bright or dark your pictures are.
It has a Stabilizer to help you stabilize your iPhone and take the finest photographs and movies possible. The Timer may be used for various purposes, including capturing high-quality self-portraits. It has a p to 6 zoom and powerful digital processing to deliver quality that outperforms the competition. Moreover, you can easily share your videos on any social media platform with this application.
Part 3: Stabilize Video with Best Free iPhone Video Stabilizer Apps After Recording
If you have downloaded the An easy way to stabilize iPhone video is through some third-party free apps that you can download from App Store quickly. Some of the useful ones are:

1. Hyperlapse from Instagram
Although Hyperlapse isn’t a recent addition to the App Store, the Instagram spin-off provides creative people with a simple and amazingly efficient means of presenting a narrative in video. The free app has two standout features: timelapse, which allows you to film initially and then speed up afterward, and Instagram’s in-house stabilization, which does an excellent job of eradicating handheld wobbling.
The result is a video clip that condenses full dawn, stroll to work, or airline take-off into a few seconds, all while maintaining the trademark silky smooth Hyperlapse appearance.
How to Stabilize a Video Using Hyperlapse from Instagram?
Follow instructions below to stabilize a video using Hyerlapse from Instagram:
Step 1: Launch the Hyperlapse from Instagram app on your iPhone
Step 2: Start recording the video by clicking the white button in the center and tapping again to end it.
Step 3: To stabilize the video, set the speed to 1x by moving the slider to the left.

2. Emulsio
Emulsio is another application you may use, albeit it is not free. It’s designed exclusively for iOS users to eliminate wobbly photos. It accomplishes this by correcting vertical, horizontal, or rotating camera movement and reducing shaky pictures. It functions as an extension of the Photos app so that you may access its capabilities from the Photos app on your iPhone.
How to Stabilize a Video Using Emulsio?
Use the following instruction to stabilize a video using this application:
Step 1: Launch the Emulsio app and select the video you wish to stabilize.
Step 2: When you select the video, Emulsio automatically stabilizes it. However, you can also adjust the stabilization strength by moving the slider to the left.
Step 3: Once you’re done, export the video by tapping the Export button in the left corner.
3. Google Photos
Google Photos, which you do have on your phone, is a free application that may help you stabilize an iPhone video. If not, you may get it for free from the Apple Store.
It might be hard for people to believe that this application can stabilize the video. However, they are wrong because Google Photos is an excellent iPhone video stabilizer app. And since it’s from Google, you can rely on it. Apart from stabilizing, it offers various editing tools as well.
How to Stabilize a Video With Google Photos?
Use the following instruction to stabilize a video using this application:
Step 1: Open Go to Google Photos on your iPhone and choose the video
Step 2: After that, click the Edit icon. Select Stabilize and wait for the application to complete its video processing.
Step 3: Once the processing is complete, the stabilized video will be saved automatically.
For more details, check this tutorial: How to Stabilize Videos for Free with Google Photos App.
4. CapCut
CapCut is currently amongst popular video editing applications for iPhone and Android. And, while it was developed by the same firm that created TikTok, it is significantly more than simply a TikTok video editor.
In truth, CapCut’s video editing software is robust. You can quickly produce videos for any network with your iPhone. It comes with a fantastic stabilizing tool that allows you to reduce shakiness from your iPhone footage promptly.
How to Stabilize a Video Using CapCut?
Follow the steps below to stabilize a video using CapCut:
Step 1: Open CapCut and click on New Project to import the video you wish to stabilize.
Step 2: Slide down the bottom menu until you find Stabilize, and click on it.
Step 3: Move the slider that appears to the right to define stabilization strength. After that, click on the Tick button in the left corner.
Step 4: Now, click on Download and then Save Video to export it.
Part 4: Tips for Shooting Stable Videos with iPhone
The first step to capturing a stabilized video is to understand what your phone is capable of and how to deal with it while capturing smartphone films. As long as you apply the following criteria, your smartphone should react to realistic hand movements:
Grip Properly
If you can mount your iPhone to a tripod, then great. However, if it’s not possible, you need to firmly hold your phone in your hand and stay still to capture a stabilized video. By keeping the phone firmly in your hand, you can avoid all the shakiness that will result in stabilization.
Trigger Remotely
One more step to avoid the shakiness is starting the video with remote triggers. It’s better to start the video with your Headphone’s volume button because, in that way, you won’t need to touch the screen that can destabilize your video.
Favor the Volume Button
Another helpful thing for capturing a stabilized video is to favor your phone’s Volume Buttons. iPhone allows the user to capture the video as long as they hold the Volume and Power buttons. S, capture the video with the help of Volume Buttons.
Conclusion
So, those are some of the methods to stabilize iPhone video. You have a variety of alternatives depending on how far you are ready to go to get that steady shot. You may also utilize a mix of the approaches mentioned above and technologies to create an expert vlog, podcast, instructive video, and more.
No matter how eye-catching your subject is or how fantastic your clip is, viewers will quickly lose interest if the video is choppy. They’re simply unprofessional and annoying. If you wish to enhance your photography skills, especially with your iPhone, you’ve come to the right place.
This post will teach you some ways to stabilize iPhone video. Let’s explore how you can transform your film from beginner to professional—or, at the very least, somewhere in between—with a few approaches and a few tools!
In this article
01 Use Handheld Stabilizers to Shoot Stable on iPhone During Recording
02 Shoot with Camera Apps to Stabilize
03 Stabilize Video with Best Free iPhone Video Stabilizer Apps After Recording
04 Tips for Shooting Stable Videos with iPhone
Part 1: Use Handheld Stabilizers to Shoot Stable on iPhone During Recording
With stabilizer tools, you can improve the quality of all your memories. They are many and manufactured by several firms, but your interactions with friends and family are priceless. We will look at two of the best:

1. DJI Osmo Mobile 4
A gimbal stabilizer employs sensors and motors to maintain your device level. As a result, it considerably minimizes the requirement for video stabilizing post-processing. The DJI Osmo Mobile 4 is a good choice for gimbal stabilizers. Link your smartphone to the spring-loaded clip, switch on the gimbal, and the stabilizer will do its magic—or science!
The ActiveTrack function is one you’ll like because it works well for stabilizing photos and maintaining the subject in the frame. Simply because of this capability, the DJI Osmo Mobile 4 is ideal for vlogging and live to broadcast. It also provides dramatic and dolly zoom effects, which are likely to enhance the quality of your recordings. And it has a landscape orientation feature that other gimbal stabilizers do not have.
2. Zhiyun Smooth 4
This popular three-axis gimbal is capable of meeting your stabilization requirements with high-quality results. It enables users to manage the device from afar via a specialized remote application, and it also allows for 360-degree movement without interfering with the video. Professionals consider its battery life one of its most significant features, as it can easily last 3 to 4 hours.
It has a Zero Noise function, which is popular among professionals. It provides 360-degree rotation with excellent stability. Furthermore, the device has an intelligent face track function that gives amazing video stabilization.
This Stabilizer is suitable for smartphones that are less than 6.0 inches in size. Bluetooth connectivity allows you to control the device with your phone using the dedicated app. Don’t let its light weight fool you because Zhiyun Smooth 4 is solidly built.
 dotConnect for Oracle is an ADO.NET data provider for Oracle with Entity Framework Support.
Part 2: Shoot with Camera Apps to Stabilize
Well, if you don’t want to purchase any gimbal, you can try some camera apps to capture a stabilized video directly on your iPhone.
1. FiLMiC Pro
FiLMiC Pro is amongst the most enhanced mobile cinematic video camera ever. FiLMiC Pro is the most responsive manual filmmaking app available on mobile, with cutting-edge capabilities. FiLMiC Pro has been named iOS Video Camera App of the Year. It has been utilized in more high-profile video productions by award-winning producers than any other app.
FiLMiC Pro also has a selection of dramatic film looks that may be done in-camera at the time of shooting to create a fully cinematic style without the need for post-production grading. So, you can use this camera app to capture stabilized videos on your iPhone.
2. ProCamera
ProCamera is intended to be a go-to camera app that is simple to use in everyday settings while still being deep and multipurpose for special events and expert use cases. It gives you complete control over your iPhone camera, yet it never gets in the way of shooting an image. ProCamera not only delivers pro-level DSLR camera functions but also has a high-end video capture mode and extensive editing tools.
This camera app offers a beautiful stabilization to the video. You can also add stabilization to the video after capturing it with the help of the stabilization tool present in this application. Moreover, every component of ProCamera has been intended to capture the moment flawlessly every time you press the shutter button.
3. Camera+ Legacy
Whether you’re a professional photographer or have never held a camera before, Camera+ will make you fall in love with snapping images and recording movies. It enables you to set exposure independently of focus. You can now quickly adjust how bright or dark your pictures are.
It has a Stabilizer to help you stabilize your iPhone and take the finest photographs and movies possible. The Timer may be used for various purposes, including capturing high-quality self-portraits. It has a p to 6 zoom and powerful digital processing to deliver quality that outperforms the competition. Moreover, you can easily share your videos on any social media platform with this application.
Part 3: Stabilize Video with Best Free iPhone Video Stabilizer Apps After Recording
If you have downloaded the An easy way to stabilize iPhone video is through some third-party free apps that you can download from App Store quickly. Some of the useful ones are:
1. Hyperlapse from Instagram
Although Hyperlapse isn’t a recent addition to the App Store, the Instagram spin-off provides creative people with a simple and amazingly efficient means of presenting a narrative in video. The free app has two standout features: timelapse, which allows you to film initially and then speed up afterward, and Instagram’s in-house stabilization, which does an excellent job of eradicating handheld wobbling.
The result is a video clip that condenses full dawn, stroll to work, or airline take-off into a few seconds, all while maintaining the trademark silky smooth Hyperlapse appearance.
How to Stabilize a Video Using Hyperlapse from Instagram?
Follow instructions below to stabilize a video using Hyerlapse from Instagram:
Step 1: Launch the Hyperlapse from Instagram app on your iPhone
Step 2: Start recording the video by clicking the white button in the center and tapping again to end it.
Step 3: To stabilize the video, set the speed to 1x by moving the slider to the left.
 LYRX is an easy-to-use karaoke software with the professional features karaoke hosts need to perform with precision. LYRX is karaoke show hosting software that supports all standard karaoke file types as well as HD video formats, and it’s truly fun to use.
2. Emulsio
Emulsio is another application you may use, albeit it is not free. It’s designed exclusively for iOS users to eliminate wobbly photos. It accomplishes this by correcting vertical, horizontal, or rotating camera movement and reducing shaky pictures. It functions as an extension of the Photos app so that you may access its capabilities from the Photos app on your iPhone.
How to Stabilize a Video Using Emulsio?
Use the following instruction to stabilize a video using this application:
Step 1: Launch the Emulsio app and select the video you wish to stabilize.
Step 2: When you select the video, Emulsio automatically stabilizes it. However, you can also adjust the stabilization strength by moving the slider to the left.
Step 3: Once you’re done, export the video by tapping the Export button in the left corner.
3. Google Photos
Google Photos, which you do have on your phone, is a free application that may help you stabilize an iPhone video. If not, you may get it for free from the Apple Store.
It might be hard for people to believe that this application can stabilize the video. However, they are wrong because Google Photos is an excellent iPhone video stabilizer app. And since it’s from Google, you can rely on it. Apart from stabilizing, it offers various editing tools as well.

WPS Office Premium ( File Recovery, Photo Scanning, Convert PDF)–Yearly
How to Stabilize a Video With Google Photos?
Use the following instruction to stabilize a video using this application:
Step 1: Open Go to Google Photos on your iPhone and choose the video
Step 2: After that, click the Edit icon. Select Stabilize and wait for the application to complete its video processing.
Step 3: Once the processing is complete, the stabilized video will be saved automatically.
For more details, check this tutorial: How to Stabilize Videos for Free with Google Photos App.
4. CapCut
CapCut is currently amongst popular video editing applications for iPhone and Android. And, while it was developed by the same firm that created TikTok, it is significantly more than simply a TikTok video editor.
In truth, CapCut’s video editing software is robust. You can quickly produce videos for any network with your iPhone. It comes with a fantastic stabilizing tool that allows you to reduce shakiness from your iPhone footage promptly.
How to Stabilize a Video Using CapCut?
Follow the steps below to stabilize a video using CapCut:
Step 1: Open CapCut and click on New Project to import the video you wish to stabilize.
Step 2: Slide down the bottom menu until you find Stabilize, and click on it.
Step 3: Move the slider that appears to the right to define stabilization strength. After that, click on the Tick button in the left corner.
Step 4: Now, click on Download and then Save Video to export it.
Part 4: Tips for Shooting Stable Videos with iPhone
The first step to capturing a stabilized video is to understand what your phone is capable of and how to deal with it while capturing smartphone films. As long as you apply the following criteria, your smartphone should react to realistic hand movements:
Grip Properly
If you can mount your iPhone to a tripod, then great. However, if it’s not possible, you need to firmly hold your phone in your hand and stay still to capture a stabilized video. By keeping the phone firmly in your hand, you can avoid all the shakiness that will result in stabilization.
Trigger Remotely
One more step to avoid the shakiness is starting the video with remote triggers. It’s better to start the video with your Headphone’s volume button because, in that way, you won’t need to touch the screen that can destabilize your video.
Favor the Volume Button
Another helpful thing for capturing a stabilized video is to favor your phone’s Volume Buttons. iPhone allows the user to capture the video as long as they hold the Volume and Power buttons. S, capture the video with the help of Volume Buttons.
Conclusion
So, those are some of the methods to stabilize iPhone video. You have a variety of alternatives depending on how far you are ready to go to get that steady shot. You may also utilize a mix of the approaches mentioned above and technologies to create an expert vlog, podcast, instructive video, and more.
No matter how eye-catching your subject is or how fantastic your clip is, viewers will quickly lose interest if the video is choppy. They’re simply unprofessional and annoying. If you wish to enhance your photography skills, especially with your iPhone, you’ve come to the right place.
This post will teach you some ways to stabilize iPhone video. Let’s explore how you can transform your film from beginner to professional—or, at the very least, somewhere in between—with a few approaches and a few tools!
In this article
01 Use Handheld Stabilizers to Shoot Stable on iPhone During Recording
02 Shoot with Camera Apps to Stabilize
03 Stabilize Video with Best Free iPhone Video Stabilizer Apps After Recording
04 Tips for Shooting Stable Videos with iPhone
Part 1: Use Handheld Stabilizers to Shoot Stable on iPhone During Recording
With stabilizer tools, you can improve the quality of all your memories. They are many and manufactured by several firms, but your interactions with friends and family are priceless. We will look at two of the best:
1. DJI Osmo Mobile 4
A gimbal stabilizer employs sensors and motors to maintain your device level. As a result, it considerably minimizes the requirement for video stabilizing post-processing. The DJI Osmo Mobile 4 is a good choice for gimbal stabilizers. Link your smartphone to the spring-loaded clip, switch on the gimbal, and the stabilizer will do its magic—or science!
The ActiveTrack function is one you’ll like because it works well for stabilizing photos and maintaining the subject in the frame. Simply because of this capability, the DJI Osmo Mobile 4 is ideal for vlogging and live to broadcast. It also provides dramatic and dolly zoom effects, which are likely to enhance the quality of your recordings. And it has a landscape orientation feature that other gimbal stabilizers do not have.

2. Zhiyun Smooth 4
This popular three-axis gimbal is capable of meeting your stabilization requirements with high-quality results. It enables users to manage the device from afar via a specialized remote application, and it also allows for 360-degree movement without interfering with the video. Professionals consider its battery life one of its most significant features, as it can easily last 3 to 4 hours.
It has a Zero Noise function, which is popular among professionals. It provides 360-degree rotation with excellent stability. Furthermore, the device has an intelligent face track function that gives amazing video stabilization.
This Stabilizer is suitable for smartphones that are less than 6.0 inches in size. Bluetooth connectivity allows you to control the device with your phone using the dedicated app. Don’t let its light weight fool you because Zhiyun Smooth 4 is solidly built.

Part 2: Shoot with Camera Apps to Stabilize
Well, if you don’t want to purchase any gimbal, you can try some camera apps to capture a stabilized video directly on your iPhone.
1. FiLMiC Pro
FiLMiC Pro is amongst the most enhanced mobile cinematic video camera ever. FiLMiC Pro is the most responsive manual filmmaking app available on mobile, with cutting-edge capabilities. FiLMiC Pro has been named iOS Video Camera App of the Year. It has been utilized in more high-profile video productions by award-winning producers than any other app.
FiLMiC Pro also has a selection of dramatic film looks that may be done in-camera at the time of shooting to create a fully cinematic style without the need for post-production grading. So, you can use this camera app to capture stabilized videos on your iPhone.
2. ProCamera
ProCamera is intended to be a go-to camera app that is simple to use in everyday settings while still being deep and multipurpose for special events and expert use cases. It gives you complete control over your iPhone camera, yet it never gets in the way of shooting an image. ProCamera not only delivers pro-level DSLR camera functions but also has a high-end video capture mode and extensive editing tools.
This camera app offers a beautiful stabilization to the video. You can also add stabilization to the video after capturing it with the help of the stabilization tool present in this application. Moreover, every component of ProCamera has been intended to capture the moment flawlessly every time you press the shutter button.
3. Camera+ Legacy
Whether you’re a professional photographer or have never held a camera before, Camera+ will make you fall in love with snapping images and recording movies. It enables you to set exposure independently of focus. You can now quickly adjust how bright or dark your pictures are.
It has a Stabilizer to help you stabilize your iPhone and take the finest photographs and movies possible. The Timer may be used for various purposes, including capturing high-quality self-portraits. It has a p to 6 zoom and powerful digital processing to deliver quality that outperforms the competition. Moreover, you can easily share your videos on any social media platform with this application.
Part 3: Stabilize Video with Best Free iPhone Video Stabilizer Apps After Recording
If you have downloaded the An easy way to stabilize iPhone video is through some third-party free apps that you can download from App Store quickly. Some of the useful ones are:

1. Hyperlapse from Instagram
Although Hyperlapse isn’t a recent addition to the App Store, the Instagram spin-off provides creative people with a simple and amazingly efficient means of presenting a narrative in video. The free app has two standout features: timelapse, which allows you to film initially and then speed up afterward, and Instagram’s in-house stabilization, which does an excellent job of eradicating handheld wobbling.
The result is a video clip that condenses full dawn, stroll to work, or airline take-off into a few seconds, all while maintaining the trademark silky smooth Hyperlapse appearance.
How to Stabilize a Video Using Hyperlapse from Instagram?
Follow instructions below to stabilize a video using Hyerlapse from Instagram:
Step 1: Launch the Hyperlapse from Instagram app on your iPhone
Step 2: Start recording the video by clicking the white button in the center and tapping again to end it.
Step 3: To stabilize the video, set the speed to 1x by moving the slider to the left.
2. Emulsio
Emulsio is another application you may use, albeit it is not free. It’s designed exclusively for iOS users to eliminate wobbly photos. It accomplishes this by correcting vertical, horizontal, or rotating camera movement and reducing shaky pictures. It functions as an extension of the Photos app so that you may access its capabilities from the Photos app on your iPhone.
How to Stabilize a Video Using Emulsio?
Use the following instruction to stabilize a video using this application:
Step 1: Launch the Emulsio app and select the video you wish to stabilize.
Step 2: When you select the video, Emulsio automatically stabilizes it. However, you can also adjust the stabilization strength by moving the slider to the left.
Step 3: Once you’re done, export the video by tapping the Export button in the left corner.
3. Google Photos
Google Photos, which you do have on your phone, is a free application that may help you stabilize an iPhone video. If not, you may get it for free from the Apple Store.
It might be hard for people to believe that this application can stabilize the video. However, they are wrong because Google Photos is an excellent iPhone video stabilizer app. And since it’s from Google, you can rely on it. Apart from stabilizing, it offers various editing tools as well.
How to Stabilize a Video With Google Photos?
Use the following instruction to stabilize a video using this application:
Step 1: Open Go to Google Photos on your iPhone and choose the video
Step 2: After that, click the Edit icon. Select Stabilize and wait for the application to complete its video processing.
Step 3: Once the processing is complete, the stabilized video will be saved automatically.
For more details, check this tutorial: How to Stabilize Videos for Free with Google Photos App.
 Glarysoft File Recovery Pro Annually - Helps to recover your lost file/data, even permanently deleted data.
4. CapCut
CapCut is currently amongst popular video editing applications for iPhone and Android. And, while it was developed by the same firm that created TikTok, it is significantly more than simply a TikTok video editor.
In truth, CapCut’s video editing software is robust. You can quickly produce videos for any network with your iPhone. It comes with a fantastic stabilizing tool that allows you to reduce shakiness from your iPhone footage promptly.
How to Stabilize a Video Using CapCut?
Follow the steps below to stabilize a video using CapCut:
Step 1: Open CapCut and click on New Project to import the video you wish to stabilize.
Step 2: Slide down the bottom menu until you find Stabilize, and click on it.
Step 3: Move the slider that appears to the right to define stabilization strength. After that, click on the Tick button in the left corner.
Step 4: Now, click on Download and then Save Video to export it.
Part 4: Tips for Shooting Stable Videos with iPhone
The first step to capturing a stabilized video is to understand what your phone is capable of and how to deal with it while capturing smartphone films. As long as you apply the following criteria, your smartphone should react to realistic hand movements:
Grip Properly
If you can mount your iPhone to a tripod, then great. However, if it’s not possible, you need to firmly hold your phone in your hand and stay still to capture a stabilized video. By keeping the phone firmly in your hand, you can avoid all the shakiness that will result in stabilization.
Trigger Remotely
One more step to avoid the shakiness is starting the video with remote triggers. It’s better to start the video with your Headphone’s volume button because, in that way, you won’t need to touch the screen that can destabilize your video.
Favor the Volume Button
Another helpful thing for capturing a stabilized video is to favor your phone’s Volume Buttons. iPhone allows the user to capture the video as long as they hold the Volume and Power buttons. S, capture the video with the help of Volume Buttons.
Conclusion
So, those are some of the methods to stabilize iPhone video. You have a variety of alternatives depending on how far you are ready to go to get that steady shot. You may also utilize a mix of the approaches mentioned above and technologies to create an expert vlog, podcast, instructive video, and more.
No matter how eye-catching your subject is or how fantastic your clip is, viewers will quickly lose interest if the video is choppy. They’re simply unprofessional and annoying. If you wish to enhance your photography skills, especially with your iPhone, you’ve come to the right place.
This post will teach you some ways to stabilize iPhone video. Let’s explore how you can transform your film from beginner to professional—or, at the very least, somewhere in between—with a few approaches and a few tools!
In this article
01 Use Handheld Stabilizers to Shoot Stable on iPhone During Recording
02 Shoot with Camera Apps to Stabilize
03 Stabilize Video with Best Free iPhone Video Stabilizer Apps After Recording
04 Tips for Shooting Stable Videos with iPhone
Part 1: Use Handheld Stabilizers to Shoot Stable on iPhone During Recording
With stabilizer tools, you can improve the quality of all your memories. They are many and manufactured by several firms, but your interactions with friends and family are priceless. We will look at two of the best:
1. DJI Osmo Mobile 4
A gimbal stabilizer employs sensors and motors to maintain your device level. As a result, it considerably minimizes the requirement for video stabilizing post-processing. The DJI Osmo Mobile 4 is a good choice for gimbal stabilizers. Link your smartphone to the spring-loaded clip, switch on the gimbal, and the stabilizer will do its magic—or science!
The ActiveTrack function is one you’ll like because it works well for stabilizing photos and maintaining the subject in the frame. Simply because of this capability, the DJI Osmo Mobile 4 is ideal for vlogging and live to broadcast. It also provides dramatic and dolly zoom effects, which are likely to enhance the quality of your recordings. And it has a landscape orientation feature that other gimbal stabilizers do not have.
2. Zhiyun Smooth 4
This popular three-axis gimbal is capable of meeting your stabilization requirements with high-quality results. It enables users to manage the device from afar via a specialized remote application, and it also allows for 360-degree movement without interfering with the video. Professionals consider its battery life one of its most significant features, as it can easily last 3 to 4 hours.
It has a Zero Noise function, which is popular among professionals. It provides 360-degree rotation with excellent stability. Furthermore, the device has an intelligent face track function that gives amazing video stabilization.
This Stabilizer is suitable for smartphones that are less than 6.0 inches in size. Bluetooth connectivity allows you to control the device with your phone using the dedicated app. Don’t let its light weight fool you because Zhiyun Smooth 4 is solidly built.

Part 2: Shoot with Camera Apps to Stabilize
Well, if you don’t want to purchase any gimbal, you can try some camera apps to capture a stabilized video directly on your iPhone.
 PaperScan Professional: PaperScan Scanner Software is a powerful TWAIN & WIA scanning application centered on one idea: making document acquisition an unparalleled easy task for anyone.
1. FiLMiC Pro
FiLMiC Pro is amongst the most enhanced mobile cinematic video camera ever. FiLMiC Pro is the most responsive manual filmmaking app available on mobile, with cutting-edge capabilities. FiLMiC Pro has been named iOS Video Camera App of the Year. It has been utilized in more high-profile video productions by award-winning producers than any other app.
FiLMiC Pro also has a selection of dramatic film looks that may be done in-camera at the time of shooting to create a fully cinematic style without the need for post-production grading. So, you can use this camera app to capture stabilized videos on your iPhone.
2. ProCamera

ProCamera is intended to be a go-to camera app that is simple to use in everyday settings while still being deep and multipurpose for special events and expert use cases. It gives you complete control over your iPhone camera, yet it never gets in the way of shooting an image. ProCamera not only delivers pro-level DSLR camera functions but also has a high-end video capture mode and extensive editing tools.
This camera app offers a beautiful stabilization to the video. You can also add stabilization to the video after capturing it with the help of the stabilization tool present in this application. Moreover, every component of ProCamera has been intended to capture the moment flawlessly every time you press the shutter button.
### 3\. [Camera+ Legacy](https://apps.apple.com/us/app/camera-legacy/id329670577)
Whether you’re a professional photographer or have never held a camera before, Camera+ will make you fall in love with snapping images and recording movies. It enables you to set exposure independently of focus. You can now quickly adjust how bright or dark your pictures are.
It has a Stabilizer to help you stabilize your iPhone and take the finest photographs and movies possible. The Timer may be used for various purposes, including capturing high-quality self-portraits. It has a p to 6 zoom and powerful digital processing to deliver quality that outperforms the competition. Moreover, you can easily share your videos on any social media platform with this application.
Part 3: Stabilize Video with Best Free iPhone Video Stabilizer Apps After Recording
If you have downloaded the An easy way to stabilize iPhone video is through some third-party free apps that you can download from App Store quickly. Some of the useful ones are:
1. Hyperlapse from Instagram
Although Hyperlapse isn’t a recent addition to the App Store, the Instagram spin-off provides creative people with a simple and amazingly efficient means of presenting a narrative in video. The free app has two standout features: timelapse, which allows you to film initially and then speed up afterward, and Instagram’s in-house stabilization, which does an excellent job of eradicating handheld wobbling.
The result is a video clip that condenses full dawn, stroll to work, or airline take-off into a few seconds, all while maintaining the trademark silky smooth Hyperlapse appearance.
How to Stabilize a Video Using Hyperlapse from Instagram?
Follow instructions below to stabilize a video using Hyerlapse from Instagram:
Step 1: Launch the Hyperlapse from Instagram app on your iPhone
Step 2: Start recording the video by clicking the white button in the center and tapping again to end it.
Step 3: To stabilize the video, set the speed to 1x by moving the slider to the left.
2. Emulsio
Emulsio is another application you may use, albeit it is not free. It’s designed exclusively for iOS users to eliminate wobbly photos. It accomplishes this by correcting vertical, horizontal, or rotating camera movement and reducing shaky pictures. It functions as an extension of the Photos app so that you may access its capabilities from the Photos app on your iPhone.
How to Stabilize a Video Using Emulsio?
Use the following instruction to stabilize a video using this application:
Step 1: Launch the Emulsio app and select the video you wish to stabilize.
Step 2: When you select the video, Emulsio automatically stabilizes it. However, you can also adjust the stabilization strength by moving the slider to the left.
Step 3: Once you’re done, export the video by tapping the Export button in the left corner.
3. Google Photos
Google Photos, which you do have on your phone, is a free application that may help you stabilize an iPhone video. If not, you may get it for free from the Apple Store.
It might be hard for people to believe that this application can stabilize the video. However, they are wrong because Google Photos is an excellent iPhone video stabilizer app. And since it’s from Google, you can rely on it. Apart from stabilizing, it offers various editing tools as well.
How to Stabilize a Video With Google Photos?
Use the following instruction to stabilize a video using this application:
Step 1: Open Go to Google Photos on your iPhone and choose the video
Step 2: After that, click the Edit icon. Select Stabilize and wait for the application to complete its video processing.
Step 3: Once the processing is complete, the stabilized video will be saved automatically.
For more details, check this tutorial: How to Stabilize Videos for Free with Google Photos App.
4. CapCut
CapCut is currently amongst popular video editing applications for iPhone and Android. And, while it was developed by the same firm that created TikTok, it is significantly more than simply a TikTok video editor.
In truth, CapCut’s video editing software is robust. You can quickly produce videos for any network with your iPhone. It comes with a fantastic stabilizing tool that allows you to reduce shakiness from your iPhone footage promptly.
How to Stabilize a Video Using CapCut?
Follow the steps below to stabilize a video using CapCut:
Step 1: Open CapCut and click on New Project to import the video you wish to stabilize.
Step 2: Slide down the bottom menu until you find Stabilize, and click on it.
Step 3: Move the slider that appears to the right to define stabilization strength. After that, click on the Tick button in the left corner.
Step 4: Now, click on Download and then Save Video to export it.
Part 4: Tips for Shooting Stable Videos with iPhone
The first step to capturing a stabilized video is to understand what your phone is capable of and how to deal with it while capturing smartphone films. As long as you apply the following criteria, your smartphone should react to realistic hand movements:
Grip Properly
If you can mount your iPhone to a tripod, then great. However, if it’s not possible, you need to firmly hold your phone in your hand and stay still to capture a stabilized video. By keeping the phone firmly in your hand, you can avoid all the shakiness that will result in stabilization.
Trigger Remotely
One more step to avoid the shakiness is starting the video with remote triggers. It’s better to start the video with your Headphone’s volume button because, in that way, you won’t need to touch the screen that can destabilize your video.
Favor the Volume Button
Another helpful thing for capturing a stabilized video is to favor your phone’s Volume Buttons. iPhone allows the user to capture the video as long as they hold the Volume and Power buttons. S, capture the video with the help of Volume Buttons.
Conclusion
So, those are some of the methods to stabilize iPhone video. You have a variety of alternatives depending on how far you are ready to go to get that steady shot. You may also utilize a mix of the approaches mentioned above and technologies to create an expert vlog, podcast, instructive video, and more.
- Title: [New] Guidelines for Reducing Shake in Mobile Videos
- Author: Frank
- Created at : 2024-07-26 12:17:37
- Updated at : 2024-07-27 12:17:37
- Link: https://some-techniques.techidaily.com/new-guidelines-for-reducing-shake-in-mobile-videos/
- License: This work is licensed under CC BY-NC-SA 4.0.