![[New] From Farm to Feast Shooting Gourmet Films with Grace](https://thmb.techidaily.com/288c4a8a533b0f1094aca3a28c5db0188ea8b5a3c3aca95005c1c84fe62729c2.jpg)
"[New] From Farm to Feast Shooting Gourmet Films with Grace"
From Farm to Feast: Shooting Gourmet Films with Grace
Food Videography: How to Shoot Food Videos


Ollie Mattison
Mar 27, 2024• Proven solutions
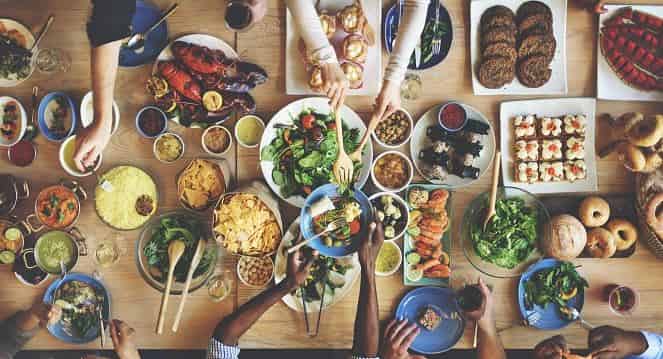
Short recipe videos are currently a popular trend on both YouTube and Instagram. They offer a visual guide to creating delicious menu items that range from delicious entrees to kid-friendly snacks.
If you would like to create some of these food videos yourself, this article will help you shoot the most appealing food videos possible.
5 Tips for Shooting Food Videos
1. Light
Light is one of the most crucial factors for your video. If the lighting is too bright, your food videography will appear washed out. If the lighting is too dark, food will appear shadowed and hard to see. Neither is a good option, because it does not present a very professional product.
The best to use is natural lighting. You want a lot of bright natural light, but not streaming directly through your windows as this creates shadows.
If the kitchen doesn’t work well for you, experiment with other rooms or outside, but be sure to keep furniture and clutter out of your shots.
2. Audio
Audio is one of the main components that sets food videography apart from food photography. There are two viable options. You can either set your video to music, which will help set the tone for your frame speed, or you can use a voice over to provide audible descriptions.

3. Try to Tell a Story
What seems like an insignificant change can be monumental. When crafting recipe videos, you want to try telling a story.
For example, instead of showing a mixer you could show a mother helping her child to mix the ingredients together. At the end of the clip, you could either show only the food, or you could show a man walking past the window with his dog in tow.
Telling a story will help to pull watchers into your video so they watch through until the end. It’s all about making viewers as invested as possible in a very short time frame.
If you don’t start pulling them in, such as by telling a story, in the first twenty seconds, they probably won’t continue watching.
4. Video Editing
Once the video is shot, you’ll have to do some post-production work. In other words, you need to edit your video. This is more time consuming than with food photography, because you must edit by frame, place to music, add title frames, and so on.
One major mistake people make with their food videos is the use of too many transitions or cut-scenes, such as fading, zoom outs, etc.
The best way to edit your videos is for quality, with a minimum of 90-97% straight shots – meaning no transitions are used.
5. Decoration
Some people will choose to shoot their videos using bold, bright colors in their food and setting.
Others may decide that a simple setting – such as a classic wooden table with nothing more than a small flower vase – is more suitable for the dish they are creating.
Both are great choices, but the key is to base your settings off your dish, ensuring the area surrounding the food is complementary and not contrasting.
Videographers may choose to use other techniques to make the final dish pop.
This could include food carving, plating techniques, or even just the use of high-tech equipment which has the potential to capture even the tiniest food fragment in vivid detail.
Parental Control Software
 Glarysoft File Recovery Pro - Helps to recover your lost file/data, even permanently deleted data.
Equipment
1. Smart Phone
One way to shoot food videos is with your smart phone. To do this, use the built-in camera feature set to take video in landscape mode (this looks the best).
Hold very still to prevent shaking, and simply hold the screen for autofocus and exposure prior to beginning your film.
 PearlMountain Image Converter
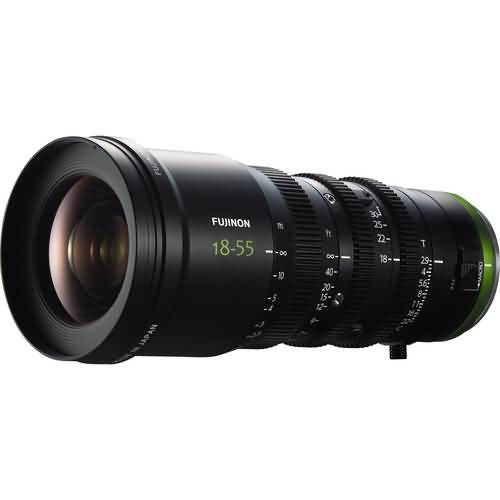
2. Lens
If you are going to shoot with a camera, you need either a mirrorless camera or DSLR. A standard click-and-shoot will not provide a high enough quality of video. Along with a high-quality camera comes the need for a high-quality lens.
The lens you shoot with should be able to zoom in or out on the food. You’ll want to avoid a lens that presents static, or has any nicks, chips, or cuts in the glass.
As for the shooting itself, you can feel free to experiment with lenses that offer unique styles, such as soft or hard

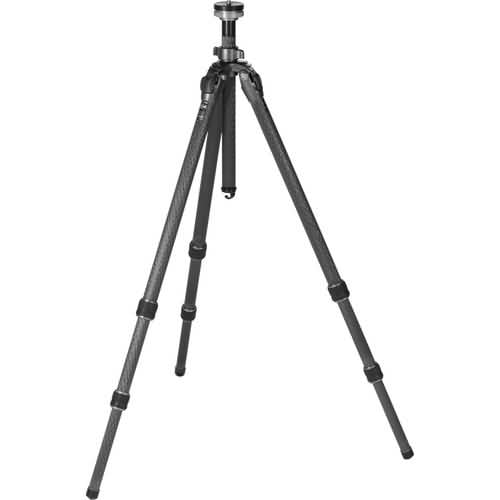
3. Tripod
Another thing you’ll want when shooting with a camera is a tripod. A tripod is necessary because it holds the camera steady, as well as allows you to be present in the video if desired.
You can find a cheap tripod at many chain stores to get you started, although you may want to invest in a better one in the future.
Conclusion
This basic guide should give you a solid start in creating top-of-the-line food videography for your social media accounts.
If you find your first video isn’t as amazing as you’d thought it would be, remember that it takes time to become a master at something. With practice, you will see the videos shot progressively becoming more professional.

 Download Mac Version ](https://tools.techidaily.com/wondershare/filmora/download/ )
Ollie Mattison
Ollie Mattison is a writer and a lover of all things video.
Follow @Ollie Mattison
Ollie Mattison
Mar 27, 2024• Proven solutions
Short recipe videos are currently a popular trend on both YouTube and Instagram. They offer a visual guide to creating delicious menu items that range from delicious entrees to kid-friendly snacks.
If you would like to create some of these food videos yourself, this article will help you shoot the most appealing food videos possible.
5 Tips for Shooting Food Videos
1. Light
Light is one of the most crucial factors for your video. If the lighting is too bright, your food videography will appear washed out. If the lighting is too dark, food will appear shadowed and hard to see. Neither is a good option, because it does not present a very professional product.
The best to use is natural lighting. You want a lot of bright natural light, but not streaming directly through your windows as this creates shadows.
If the kitchen doesn’t work well for you, experiment with other rooms or outside, but be sure to keep furniture and clutter out of your shots.
2. Audio
Audio is one of the main components that sets food videography apart from food photography. There are two viable options. You can either set your video to music, which will help set the tone for your frame speed, or you can use a voice over to provide audible descriptions.
3. Try to Tell a Story
What seems like an insignificant change can be monumental. When crafting recipe videos, you want to try telling a story.
For example, instead of showing a mixer you could show a mother helping her child to mix the ingredients together. At the end of the clip, you could either show only the food, or you could show a man walking past the window with his dog in tow.
Telling a story will help to pull watchers into your video so they watch through until the end. It’s all about making viewers as invested as possible in a very short time frame.
If you don’t start pulling them in, such as by telling a story, in the first twenty seconds, they probably won’t continue watching.
4. Video Editing
Once the video is shot, you’ll have to do some post-production work. In other words, you need to edit your video. This is more time consuming than with food photography, because you must edit by frame, place to music, add title frames, and so on.
One major mistake people make with their food videos is the use of too many transitions or cut-scenes, such as fading, zoom outs, etc.
The best way to edit your videos is for quality, with a minimum of 90-97% straight shots – meaning no transitions are used.
5. Decoration
Some people will choose to shoot their videos using bold, bright colors in their food and setting.
Others may decide that a simple setting – such as a classic wooden table with nothing more than a small flower vase – is more suitable for the dish they are creating.
Both are great choices, but the key is to base your settings off your dish, ensuring the area surrounding the food is complementary and not contrasting.
Videographers may choose to use other techniques to make the final dish pop.
This could include food carving, plating techniques, or even just the use of high-tech equipment which has the potential to capture even the tiniest food fragment in vivid detail.

 OtsAV Radio Webcaster
Equipment
1. Smart Phone
One way to shoot food videos is with your smart phone. To do this, use the built-in camera feature set to take video in landscape mode (this looks the best).
Hold very still to prevent shaking, and simply hold the screen for autofocus and exposure prior to beginning your film.
2. Lens
If you are going to shoot with a camera, you need either a mirrorless camera or DSLR. A standard click-and-shoot will not provide a high enough quality of video. Along with a high-quality camera comes the need for a high-quality lens.
The lens you shoot with should be able to zoom in or out on the food. You’ll want to avoid a lens that presents static, or has any nicks, chips, or cuts in the glass.
As for the shooting itself, you can feel free to experiment with lenses that offer unique styles, such as soft or hard
 vMix HD - Software based live production. vMix HD includes everything in vMix Basic HD plus 1000 inputs, Video List, 4 Overlay Channels, and 1 vMix Call
3. Tripod
Another thing you’ll want when shooting with a camera is a tripod. A tripod is necessary because it holds the camera steady, as well as allows you to be present in the video if desired.
You can find a cheap tripod at many chain stores to get you started, although you may want to invest in a better one in the future.
Conclusion
This basic guide should give you a solid start in creating top-of-the-line food videography for your social media accounts.
If you find your first video isn’t as amazing as you’d thought it would be, remember that it takes time to become a master at something. With practice, you will see the videos shot progressively becoming more professional.
Download Mac Version ](https://tools.techidaily.com/wondershare/filmora/download/ )
Ollie Mattison
Ollie Mattison is a writer and a lover of all things video.
Follow @Ollie Mattison
Ollie Mattison
Mar 27, 2024• Proven solutions
Short recipe videos are currently a popular trend on both YouTube and Instagram. They offer a visual guide to creating delicious menu items that range from delicious entrees to kid-friendly snacks.
If you would like to create some of these food videos yourself, this article will help you shoot the most appealing food videos possible.
 Power Tools add-on for Google Sheets, 12-month subscription
5 Tips for Shooting Food Videos
1. Light
Light is one of the most crucial factors for your video. If the lighting is too bright, your food videography will appear washed out. If the lighting is too dark, food will appear shadowed and hard to see. Neither is a good option, because it does not present a very professional product.
The best to use is natural lighting. You want a lot of bright natural light, but not streaming directly through your windows as this creates shadows.
If the kitchen doesn’t work well for you, experiment with other rooms or outside, but be sure to keep furniture and clutter out of your shots.
2. Audio
Audio is one of the main components that sets food videography apart from food photography. There are two viable options. You can either set your video to music, which will help set the tone for your frame speed, or you can use a voice over to provide audible descriptions.
3. Try to Tell a Story
What seems like an insignificant change can be monumental. When crafting recipe videos, you want to try telling a story.
For example, instead of showing a mixer you could show a mother helping her child to mix the ingredients together. At the end of the clip, you could either show only the food, or you could show a man walking past the window with his dog in tow.
Telling a story will help to pull watchers into your video so they watch through until the end. It’s all about making viewers as invested as possible in a very short time frame.
If you don’t start pulling them in, such as by telling a story, in the first twenty seconds, they probably won’t continue watching.
4. Video Editing
Once the video is shot, you’ll have to do some post-production work. In other words, you need to edit your video. This is more time consuming than with food photography, because you must edit by frame, place to music, add title frames, and so on.
One major mistake people make with their food videos is the use of too many transitions or cut-scenes, such as fading, zoom outs, etc.
The best way to edit your videos is for quality, with a minimum of 90-97% straight shots – meaning no transitions are used.
5. Decoration
Some people will choose to shoot their videos using bold, bright colors in their food and setting.
Others may decide that a simple setting – such as a classic wooden table with nothing more than a small flower vase – is more suitable for the dish they are creating.
Both are great choices, but the key is to base your settings off your dish, ensuring the area surrounding the food is complementary and not contrasting.
Videographers may choose to use other techniques to make the final dish pop.
This could include food carving, plating techniques, or even just the use of high-tech equipment which has the potential to capture even the tiniest food fragment in vivid detail.
Equipment
1. Smart Phone
One way to shoot food videos is with your smart phone. To do this, use the built-in camera feature set to take video in landscape mode (this looks the best).
Hold very still to prevent shaking, and simply hold the screen for autofocus and exposure prior to beginning your film.
2. Lens
If you are going to shoot with a camera, you need either a mirrorless camera or DSLR. A standard click-and-shoot will not provide a high enough quality of video. Along with a high-quality camera comes the need for a high-quality lens.
The lens you shoot with should be able to zoom in or out on the food. You’ll want to avoid a lens that presents static, or has any nicks, chips, or cuts in the glass.
As for the shooting itself, you can feel free to experiment with lenses that offer unique styles, such as soft or hard
3. Tripod
Another thing you’ll want when shooting with a camera is a tripod. A tripod is necessary because it holds the camera steady, as well as allows you to be present in the video if desired.
You can find a cheap tripod at many chain stores to get you started, although you may want to invest in a better one in the future.
 Lyric Video Creator Professional Version
Conclusion
This basic guide should give you a solid start in creating top-of-the-line food videography for your social media accounts.
If you find your first video isn’t as amazing as you’d thought it would be, remember that it takes time to become a master at something. With practice, you will see the videos shot progressively becoming more professional.
Download Mac Version ](https://tools.techidaily.com/wondershare/filmora/download/ )
Ollie Mattison
Ollie Mattison is a writer and a lover of all things video.
Follow @Ollie Mattison
Ollie Mattison
Mar 27, 2024• Proven solutions
Short recipe videos are currently a popular trend on both YouTube and Instagram. They offer a visual guide to creating delicious menu items that range from delicious entrees to kid-friendly snacks.
If you would like to create some of these food videos yourself, this article will help you shoot the most appealing food videos possible.
5 Tips for Shooting Food Videos
1. Light
Light is one of the most crucial factors for your video. If the lighting is too bright, your food videography will appear washed out. If the lighting is too dark, food will appear shadowed and hard to see. Neither is a good option, because it does not present a very professional product.
The best to use is natural lighting. You want a lot of bright natural light, but not streaming directly through your windows as this creates shadows.
If the kitchen doesn’t work well for you, experiment with other rooms or outside, but be sure to keep furniture and clutter out of your shots.
2. Audio
Audio is one of the main components that sets food videography apart from food photography. There are two viable options. You can either set your video to music, which will help set the tone for your frame speed, or you can use a voice over to provide audible descriptions.
3. Try to Tell a Story
What seems like an insignificant change can be monumental. When crafting recipe videos, you want to try telling a story.
For example, instead of showing a mixer you could show a mother helping her child to mix the ingredients together. At the end of the clip, you could either show only the food, or you could show a man walking past the window with his dog in tow.
Telling a story will help to pull watchers into your video so they watch through until the end. It’s all about making viewers as invested as possible in a very short time frame.
If you don’t start pulling them in, such as by telling a story, in the first twenty seconds, they probably won’t continue watching.
4. Video Editing
Once the video is shot, you’ll have to do some post-production work. In other words, you need to edit your video. This is more time consuming than with food photography, because you must edit by frame, place to music, add title frames, and so on.
One major mistake people make with their food videos is the use of too many transitions or cut-scenes, such as fading, zoom outs, etc.
The best way to edit your videos is for quality, with a minimum of 90-97% straight shots – meaning no transitions are used.
5. Decoration
Some people will choose to shoot their videos using bold, bright colors in their food and setting.
Others may decide that a simple setting – such as a classic wooden table with nothing more than a small flower vase – is more suitable for the dish they are creating.
Both are great choices, but the key is to base your settings off your dish, ensuring the area surrounding the food is complementary and not contrasting.
Videographers may choose to use other techniques to make the final dish pop.
This could include food carving, plating techniques, or even just the use of high-tech equipment which has the potential to capture even the tiniest food fragment in vivid detail.

Equipment
1. Smart Phone
One way to shoot food videos is with your smart phone. To do this, use the built-in camera feature set to take video in landscape mode (this looks the best).
Hold very still to prevent shaking, and simply hold the screen for autofocus and exposure prior to beginning your film.
 LYRX is an easy-to-use karaoke software with the professional features karaoke hosts need to perform with precision. LYRX is karaoke show hosting software that supports all standard karaoke file types as well as HD video formats, and it’s truly fun to use.
2. Lens
If you are going to shoot with a camera, you need either a mirrorless camera or DSLR. A standard click-and-shoot will not provide a high enough quality of video. Along with a high-quality camera comes the need for a high-quality lens.
The lens you shoot with should be able to zoom in or out on the food. You’ll want to avoid a lens that presents static, or has any nicks, chips, or cuts in the glass.
As for the shooting itself, you can feel free to experiment with lenses that offer unique styles, such as soft or hard
 PaperScan Professional: PaperScan Scanner Software is a powerful TWAIN & WIA scanning application centered on one idea: making document acquisition an unparalleled easy task for anyone.
3. Tripod
Another thing you’ll want when shooting with a camera is a tripod. A tripod is necessary because it holds the camera steady, as well as allows you to be present in the video if desired.
You can find a cheap tripod at many chain stores to get you started, although you may want to invest in a better one in the future.

Conclusion
This basic guide should give you a solid start in creating top-of-the-line food videography for your social media accounts.
If you find your first video isn’t as amazing as you’d thought it would be, remember that it takes time to become a master at something. With practice, you will see the videos shot progressively becoming more professional.
Download Mac Version ](https://tools.techidaily.com/wondershare/filmora/download/ )
 Epubor Audible Converter for Win: Download and convert Audible AAXC/AA/AAX to MP3 with 100% original quality preserved.
Ollie Mattison
Ollie Mattison is a writer and a lover of all things video.
Follow @Ollie Mattison
- Title: [New] From Farm to Feast Shooting Gourmet Films with Grace
- Author: Frank
- Created at : 2024-07-26 13:42:37
- Updated at : 2024-07-27 13:42:37
- Link: https://some-techniques.techidaily.com/new-from-farm-to-feast-shooting-gourmet-films-with-grace/
- License: This work is licensed under CC BY-NC-SA 4.0.