
"From Dull to Dynamic A Master's Approach to Color for 2024"
From Dull to Dynamic: A Master’s Approach to Color
Many professional photographers and editors change the photo colors to use the same photo in various outlooks. For instance, if you own a clothing brand and want to do advertising for the brand, you can change the color of outfits with a single click to save your time.
So instead of hiring various models, you can still display your collection by changing the color of outfits tactfully. In this article, we will discuss the tips to change photo color effortlessly through a photo color editor and online tool.

Part 1: Tips To Change Photo Color Like A Pro
In this section, we will give you some beneficial tips and guidelines to change the photo color through Adobe Photoshop . Moreover, we will also mention a photo color editor online to change the colors instantly.
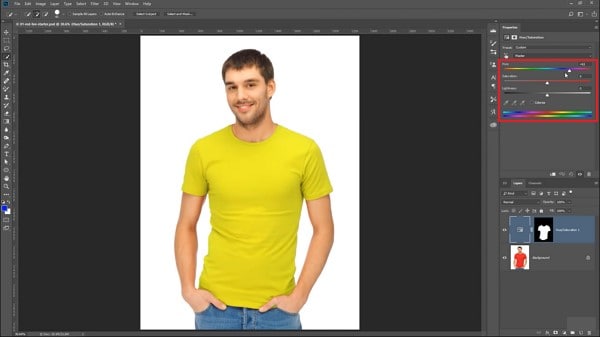
1. Tip 1: Add Any Color to Your Shirt
Do you want to change the color of any particular shirt in the photo? Then use Adobe Photoshop and open its main interface. Go to its “Quick Selection” tool and select around the shirt to change its color. Now go to the bottom right and click on “New Adjustment Layer,” and tap on “Hue and Saturation.”
On the tab of hue and saturation, you can use hue, saturation, and brightness to change the color of your selected shirt. Just use their draggers to change the color, brightness, and saturation according to your preferences. After making all the changes, you would need to find and tune the selection to get rid of minor flaws.
Another way to change the color of the shirt is by navigating to the “Solid Color Adjustment Layer.” After that, you just need to apply the “Hue and Saturation Layer” to the previous layer to make the color changes quickly. Now blend the colors by either using hue or color mode to adjust the layers.
 PearlMountain Image Converter
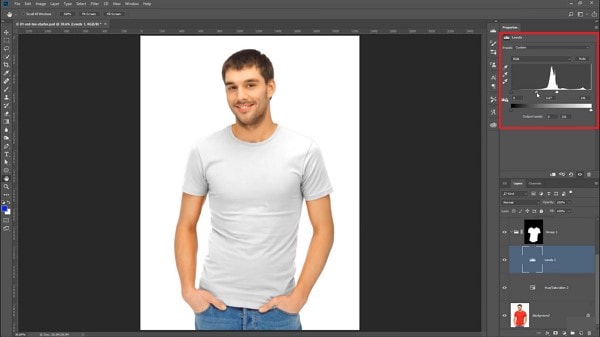
2. Tips 2: Use Black and White Colors
Another option in Adobe Photoshop photo color editor to add black or white color to the shirt is by using the “Hue and Saturation Adjustment Layer.” For this, you need to create a group and then apply a layer mask to it by reducing its saturation. After that, you can apply a hue and saturation adjustment layer to it to have a white or black effect on the shirt.
The reason for using different adjustment layers is that it can produce natural black or white effects on the shirt flawlessly. To control the intensity of a black or white color shirt, create a “Levels Adjustment Layer” and drag the points shown on the screen to build the right intensity of black or white color on the shirt.
Now do the tuning by navigating to the layer mask and also select the layers. After that, Tap on “CTRL+E” to merge all the settings and layers, and you will get your desired color.

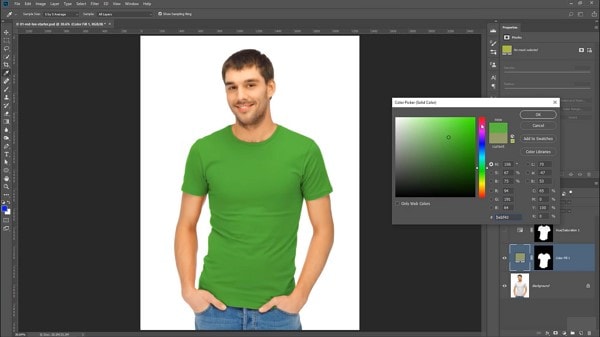
3. Tip 3: Add Color to White Object
If you want to add color to your black or white shirt, you can do it by “Hue and Saturation Adjustment Layer.” On this layer, tap on “Colorize” and choose the color you want to add. Another technique is to create a “Fill Adjustment Layer” and then change the blending mode into “Multiple.” Now, click on the “Color Picker,” and you can pick and choose your preferred color. If you want to add a dark color rather than a subtle color, change the mode to “Screen.”

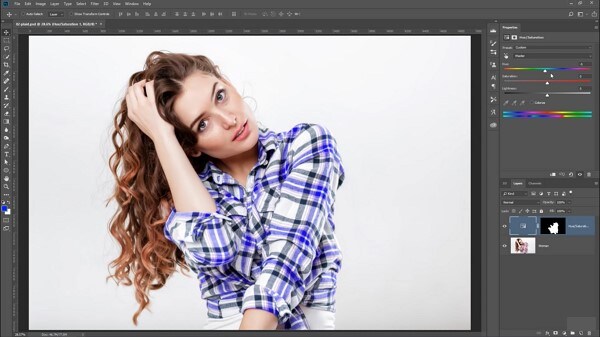
4. Tip 4: Use Direct Selection Color Picker
Through the direct selection color picker, you can change the color of an object instantly. For this, create a “Hue and Saturation Adjustment Layer,” click any part of the picture to change its color. Now drag the sliders of saturation to change the color accordingly. On the reset adjustment layer, you can pick the color from the direct selection, such as from the drop-down menu, you can select colors like reds, blues, greens, and blues.
At the bottom of the options, you can see two points that will tell you about your chosen color and the ranges it offers. You can adjust the color by dragging the sliders manually. Now, adjust the layers of your image to make the colors of the image look better.
 Screensaver Factory, Create stunning professional screensavers within minutes. Create screensavers for yourself, for marketing or unlimited royalty-free commercial distribution. Make screensavers from images, video and swf flash, add background music and smooth sprite and transition effects. Screensaver Factory is very easy to use, and it enables you to make self-installing screensaver files and CDs for easy setup and distribution. Screensaver Factory is the most advanced software of its kind.
5. Tip 5: Choose Object Color Range
Do you want to change the color of a specific part of the image? You can do this on Adobe Photoshop photo color editor by going to the “Quick Selection Tool” and then applying the colors, but it may leave edges and curves of the object. So, the recommended way is to navigate to the “Select” tab and then click on “Color Range” from its drop-down menu.
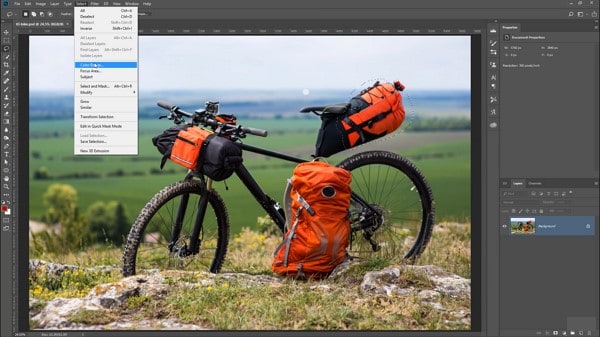
After clicking on the color range option, a pop-up window will appear from which tap on “Selection.” You can view your image on the preview window and can select the whole back using the “Selection” tool.
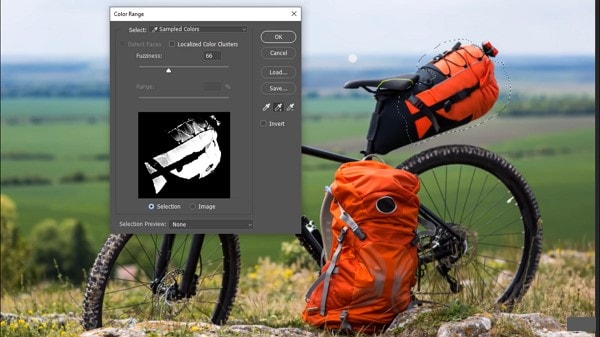
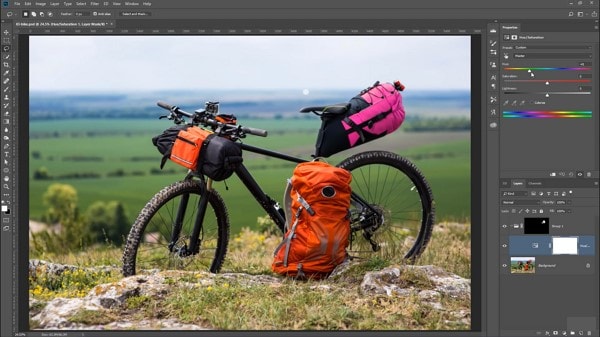
Afterward, create a group in which add layers, mask, and adjustment layers to change the saturation, color, and brightness of the selected area accurately. To only change the color, drag the sliders of hue to do it instantly.
6. Tip 6: Use Blend IF
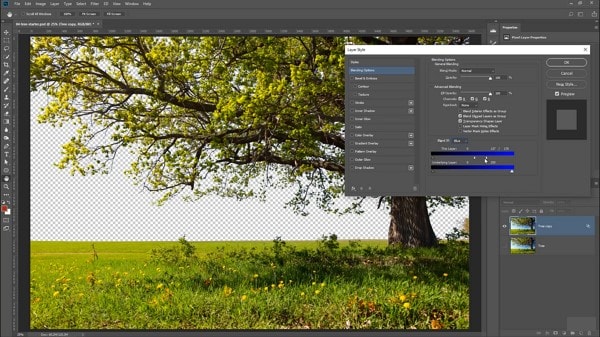
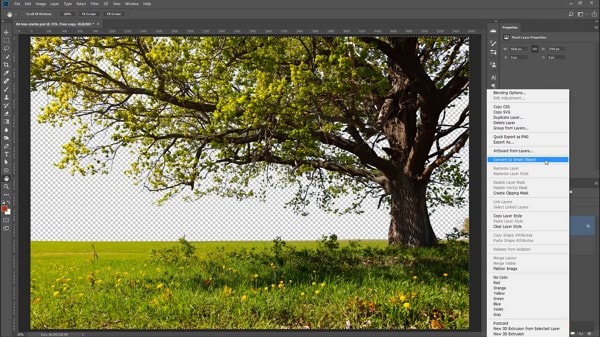
If you want to change the color of leaves on a tree, you can use the “Blend IF” option of Adobe Photoshop to precisely do the changes. Start with duplicating the existing layer and then hiding the second layer. Double click on the layer to open the menu and then use “Blend IF” sliders. This option works when you drag the sliders to black points, and it automatically hides the dark pixels of your photo.
Similarly, if you drag the “Blend IF” sliders towards white pints, it can hide the light pixels. To hide any specific color from the picture, you can click on “Channels” and then select the color you want to eradicate completely.
This method only hides color based on their luminance values; however, this loads the entire layer when loading the active pixels. Regardless, this can be changed into transparency. For this, you need to select the layer by right-clicking and selecting the option of “Convert to Smart Object.”

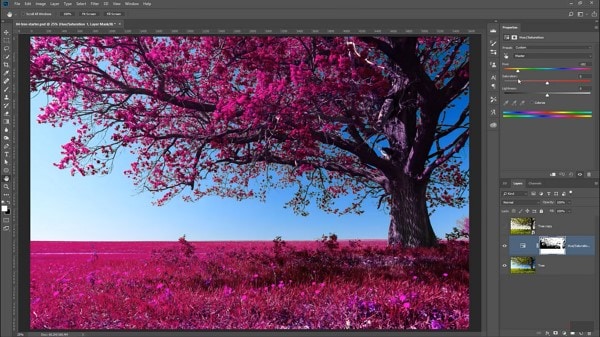
It helps the user create transparency across the layer. After hiding the layer and coming back to another object-specific layer, you can create a certain change in effect through adjustment layers. For instance, you can create a “Hue and Saturation” adjustment layer. With the above settings, Photoshop applies this as a layer mask for you. Use the sliders across the set layer to change the color across the selected areas.
7. Tip 7: Use Online Photo Editor to Change Colors
If you don’t have an offline tool like Adobe Photoshop, you can use an online photo color editor to replace the colors quickly. In this part, we will suggest BeFunky photo color editor change the photo colors efficiently.
To change the color, navigate to this tool and upload the images. Then, head to the “Replace Color” option from the left section and click on it. On the menu of “Replace Color,” select the box next to “Source Color” to choose the color you want to replace. Use an eyedropper to select any color for your image.
 Glarysoft File Recovery Pro Annually - Helps to recover your lost file/data, even permanently deleted data.
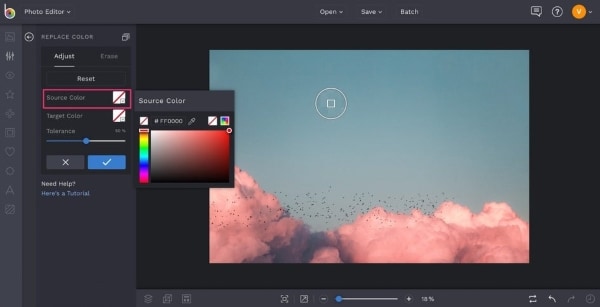
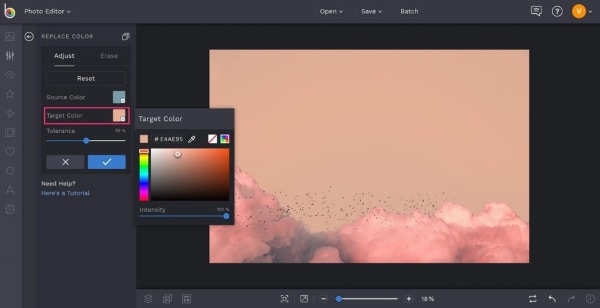
To increase or decrease the intensity of your color, use the “Tolerance” option, and drag it accordingly. If you want to change the hue of the source color, click on the box next to “Target Color.” If you have accidentally applied any color on some part, you can head to erase tab and can remove the alterations from the brush.

Conclusion
Changing the color of a photo can save us a lot of work done and effort. To effortlessly change the photo color, use the mentioned photo color editor in this article to easily execute the changes. Also, we have mentioned an online tool through which you can also change the photo color flawlessly.
- Title: From Dull to Dynamic A Master's Approach to Color for 2024
- Author: Frank
- Created at : 2024-07-26 14:36:02
- Updated at : 2024-07-27 14:36:02
- Link: https://some-techniques.techidaily.com/from-dull-to-dynamic-a-masters-approach-to-color-for-2024/
- License: This work is licensed under CC BY-NC-SA 4.0.